
DIY Solar Hot Water: Best Kits by Budget & Skill Level
Building your own solar water heating system is one of the most practical ways to cut energy bills while gaining hands-on experience with renewable technology. Whether you’re heating water for a tiny cabin or a busy family home, the right DIY solar hot water diy kit can deliver decades of free hot water—if you match it to your budget and comfort level.
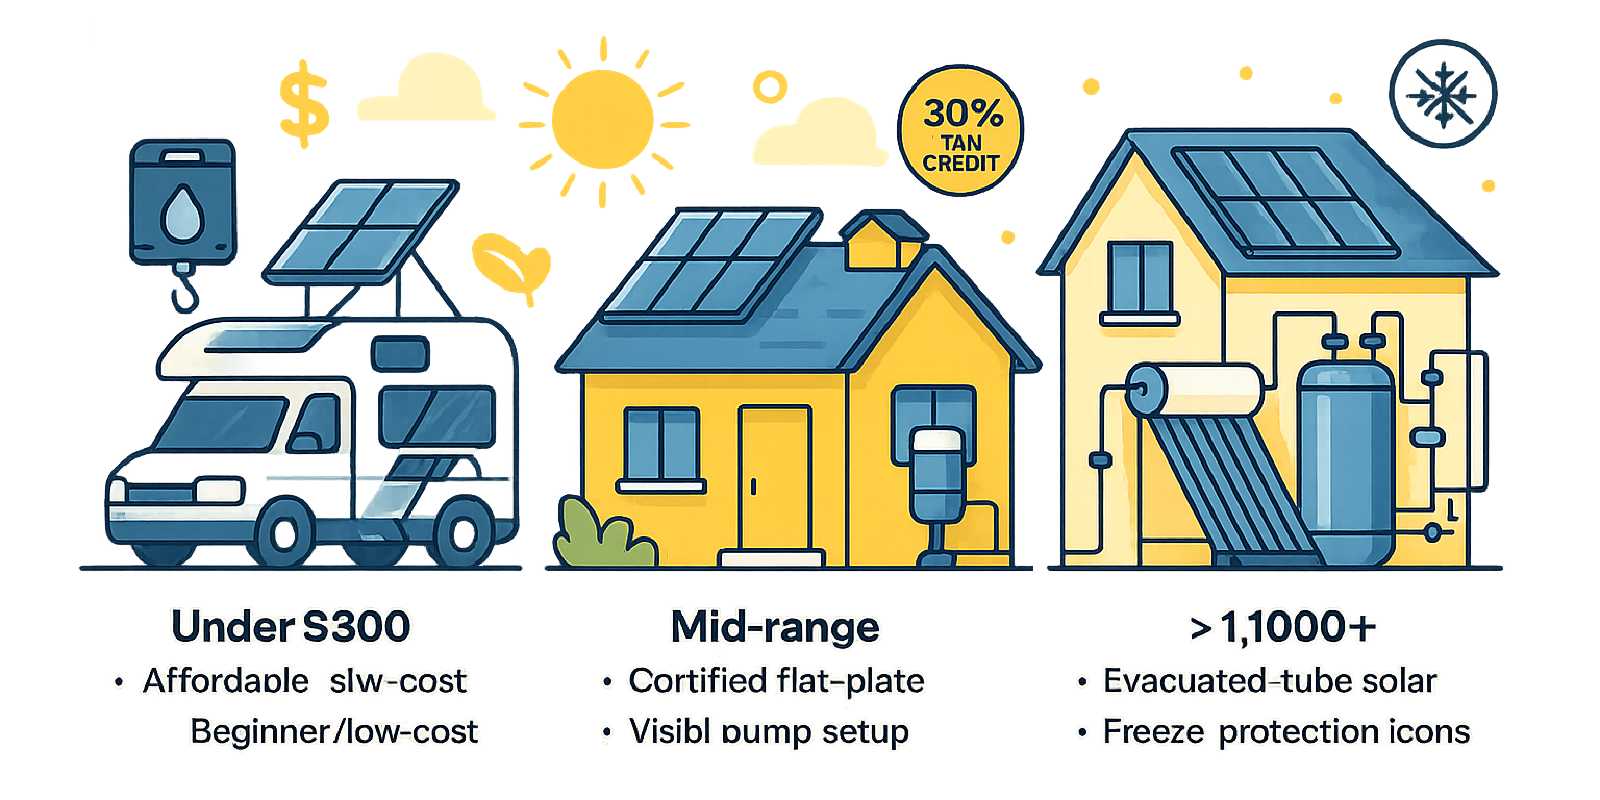
This guide walks through the best solar water heating kits across three price tiers, from ultra-budget builds under $300 to pro-grade systems exceeding $1,000. You’ll find clear comparisons, real-world performance data, installation tips from the DIY community, and everything you need to choose confidently and install safely.

🌞 Benefits of DIY Solar Hot Water Systems
Installing a diy solar powered water heater delivers tangible financial and environmental rewards that compound over time. The most immediate benefit is energy independence: solar hot water systems typically cut water-heating costs by 50–80%, depending on climate and system size. In sunny states like Arizona, California, Florida, and Texas, a well-sized kit can eliminate most electric or propane water-heating expenses from spring through fall.
Financial advantages include:
- Lower upfront cost: DIY installation saves $1,000–$3,000 in labor versus hiring a contractor.
- Federal tax credit: The 30% Residential Clean Energy Credit applies to SRCC-certified systems through 2032, reducing net cost significantly.
- Fast payback: Budget kits can pay for themselves in 1.5–4 years; mid-range systems in 3–7 years, especially with high local electricity rates.
- Long lifespan: Quality collectors last 20–30+ years, delivering net savings long after payback.
Environmental impact:
- A typical residential system offsets 1.5–2.5 tons of CO₂ annually, totaling 30–50+ tons over its lifetime.
- Solar thermal efficiency (40–70% sun-to-heat) makes excellent use of limited roof space compared to photovoltaic alternatives.
Resilience and flexibility:
- Passive thermosiphon systems work during power outages, providing hot water when the grid is down.
- Modular kits scale easily—add panels or storage as demand grows.
- DIY builds teach valuable plumbing, electrical, and troubleshooting skills transferable to other home projects.
For homeowners in sunny regions with moderate-to-high hot water use, a solar conversion kit often represents the best return on investment among all green home upgrades. The combination of federal incentives, ongoing energy savings, and minimal maintenance makes DIY solar hot water compelling for both your wallet and the planet.

🧮 Choosing the Right Solar Water Heating Kit
Selecting the ideal solar heater kit requires balancing five key factors: household size, climate, roof space, budget, and DIY skill level. Start by estimating your daily hot water demand—a typical household uses 15–25 gallons per person per day. A family of four needs roughly 60–100 gallons of storage and sufficient collector area to preheat that volume under local sun conditions.
Match collector type to climate:
- Flat-plate collectors: Best for warm, sunny climates (California, Arizona, Florida). Lower cost per square foot; efficient in strong sun and moderate temperatures. See evacuated tubes vs flat-plate collectors for detailed performance comparisons.
- Evacuated tube collectors: Superior in cold, cloudy, or windy regions (northern states, mountainous areas). Higher efficiency at large temperature differences; modular tube replacement. Premium pricing but essential for winter performance.
- PV-direct systems: Use photovoltaic panels to heat existing electric water heaters via an immersion element. No plumbing, freeze-proof, ideal for beginners. Efficiency lower than thermal collectors but simpler installation.
Assess your roof and siting:
- South-facing exposure with minimal shading is critical. Check roof pitch (latitude angle ±15° is ideal) and structural capacity to support collectors and tanks.
- Thermosiphon systems require tank placement above collectors for gravity circulation; active pumped systems offer flexible tank locations.
Budget tiers:
- Under $300: DIY scratch builds, small PV-direct kits, portable batch heaters. Best for single users, RVs, or summer-only cabins.
- $300–$1,000: Pre-packaged flat-plate or small evacuated-tube kits with basic pumps/controllers. Suitable for 2–4 person households with moderate skill.
- $1,000+: Premium evacuated-tube systems, large flat-plate arrays, glycol-loop freeze protection. Sized for families, off-grid homes, or year-round performance in harsh climates.
Skill level considerations:
- Beginner: Choose plug-and-play PV-direct kits or simple batch collectors. Minimal plumbing; basic electrical work.
- Intermediate: Pre-packaged active systems with detailed instructions. Requires copper pipe soldering, pump wiring, and roof mounting.
- Advanced: Custom component builds, drainback systems, or glycol loops. Demands plumbing, electrical, and roofing expertise plus code compliance knowledge.
Certification and incentives:
Many U.S. states and utilities require SRCC OG-300 certification for rebate eligibility. California, Massachusetts, New York, and several Florida and Texas utilities mandate this standard. Pre-packaged kits from manufacturers like SunMaxx clearly state OG-300 compliance; DIY scratch builds typically do not qualify. Verify certification status before purchase if you plan to claim the federal tax credit or local rebates. Learn more at rebates & credits: how to qualify.
Use this framework to narrow your options before diving into specific kit reviews below.

🛠️ Top Budget Kits under $300
Ultra-budget solar heating kits deliver surprising performance for campers, RVers, preppers, and single-person households willing to trade some efficiency for massive cost savings. These systems typically heat smaller volumes (5–30 gallons) and work best in warm, sunny climates with minimal freeze risk.
Practical Preppers PV-Direct Solar Hot Water Kit (~$1,000–$1,300)
While slightly above the $300 mark, the Practical Preppers PV-Direct system is the most cost-effective turnkey option for DIY beginners. It uses 3–4 photovoltaic panels (up to 1,400W total) paired with an MPPT charge controller to power the existing electric element in your standard 40–80 gallon water heater. No plumbing modifications, no pumps, no freeze protection needed.
Pros:
- ✅ Zero plumbing work—plug into existing tank
- ✅ Works in all climates (no freeze risk)
- ✅ Simple installation in one weekend
- ✅ Modular—add panels to boost output
- ✅ Eligible for 30% federal tax credit if panels are SRCC-listed
Cons:
- ❌ Lower efficiency than thermal collectors (~18–22% vs 40–70%)
- ❌ Requires existing electric water heater
- ❌ Higher cost than true budget DIY builds
Performance: Typically supplies 50–65% of annual hot water energy in sunny states. A 1,200W PV array can deliver ~5–7 kWh per sunny day, reducing electric heating costs by $250–$400 annually. Payback in sunny regions: ~3–4 years after tax credit.
OpenSourceLowTech DIY Solar Panel Build ($50–$110 materials)
For the ultimate budget option, the OpenSourceLowTech solar panel teaches you to build a simple flat-plate collector from scratch using copper pipe, plywood, glass, and black paint. Total cost ranges from $50 for salvaged materials to $110 for all-new components.
Pros:
- ✅ Incredibly low cost
- ✅ Great learning project
- ✅ Scalable—build multiple panels
- ✅ Suitable for preheating or outdoor showers
Cons:
- ❌ No SRCC certification (ineligible for rebates)
- ❌ Requires woodworking and soldering skills
- ❌ Lower efficiency and durability than commercial panels
- ❌ Needs careful weatherproofing
Performance: A single 4×4 ft panel can deliver 8,000–12,000 BTU/day in strong sun, heating 15–20 gallons by 30–50°F. Best suited for summer preheat, camp showers, or feeding into an insulated storage tank with backup heat.
Solar Camp Shower Bags & Portable Batch Heaters ($20–$80)
For camping, emergency preparedness, or seasonal outdoor use, simple solar camp shower bags and mini solar water heater designs provide the ultimate portability. A 5-gallon black PVC bag reaches 100–110°F (38–43°C) after 3–4 hours in full sun.
Upgrades:
- 4Patriots Sun Kettle (~$60): Evacuated-tube design boils 0.5 L in ~45 minutes. Compact and rugged for backpacking.
- DIY coil heater: Coil 50–100 ft of black garden hose in a covered bucket. Heats 3–5 gallons by afternoon; costs under $30.
Use cases: Emergency water heating, off-grid cabins, RV travel, outdoor sinks. These systems have minimal insulation—use water promptly after heating to avoid losses.
💡 Personal Tip: I built a simple coil heater for my shed sink using 75 ft of black hose in a salvaged cooler. It heats 4 gallons to ~120°F by 3 PM on sunny California days—perfect for washing tools and garden produce. Total cost: $18.
Budget Kit Comparison Table
| Kit | Price Range | Capacity | Output (BTU/day) | Skill Level | Freeze Protection | Best For |
|---|---|---|---|---|---|---|
| Practical Preppers PV | $1,000–$1,300 | 40–80 gal | ~17,000–24,000 | ⭐ | N/A (electric) | Beginners, mild climates |
| OpenSourceLowTech panel | $50–$110 | 15–20 gal | ~8,000–12,000 | ⭐⭐⭐ | ❌ (drain) | DIY learners, preheat |
| Camp shower bag | $20–$40 | 5 gal | ~3,000–5,000 | ⭐ | ❌ | Camping, emergencies |
| DIY coil heater | $15–$30 | 3–5 gal | ~4,000–6,000 | ⭐ | ❌ (seasonal) | Outdoor sinks, sheds |
For step-by-step build instructions, see our guide to building a simple batch ICS solar water heater.

💰 Mid-Range Kits for Growing Families ($300–$1,000)
Mid-range solar water heating kits strike the sweet spot between affordability and performance, delivering SRCC-certified quality with professional-grade components at DIY-friendly prices. These systems typically feature 40–80 gallon storage, flat-plate or small evacuated-tube collectors, and active pump/controller setups that work year-round in most climates.
Heliatos Standard Solar Water Heater Kit (~$1,323)
The Heliatos Standard Kit offers excellent value for intermediate DIYers. It includes the SW-38 solar panel (rugged polycarbonate glazing), mounting hardware, stainless steel braided hoses, and detailed no-solder instructions. Designed to retrofit existing 40–80 gallon electric or gas water heaters.
Pros:
- ✅ No soldering required—compression fittings throughout
- ✅ Lightweight panel (easy roof mounting)
- ✅ Direct circulation design (simple plumbing)
- ✅ Strong customer support and documentation
- ✅ Works with existing tanks
Cons:
- ❌ Direct system best for mild climates (freeze risk in cold regions without draindown)
- ❌ SRCC certification status unclear—verify for tax credit eligibility
- ❌ Single panel may require multiple units for larger families
Performance: The SW-38 panel delivers approximately 15,000–20,000 BTU/day in strong sun, preheating 40 gallons by 40–60°F. In sunny states, expect 65–70% annual hot water energy savings. Payback period: ~4–6 years at typical electricity rates.
💬 Expert Advice: According to solar installer recommendations on DIY forums, Heliatos kits perform best when paired with a timer to circulate water mid-morning through late afternoon, maximizing solar gain while avoiding night-time heat loss. Install a thermostatic mixing valve for safety—solar-heated water can exceed 150°F on peak summer days.
SunMaxx HelioMaxx™ 80G Glycol Solar Hot Water Kit (~$2,800–$3,200)
For families needing robust freeze protection and higher capacity, the SunMaxx HelioMaxx 80G stands out. This complete package includes an 80-tube evacuated collector array, an 80-gallon StorMaxx storage tank with built-in heat exchanger, pump station, digital controller, pre-insulated piping, propylene glycol antifreeze, and all valves/fittings.
Pros:
- ✅ SRCC OG-300 certified (qualifies for federal tax credit and most state rebates)
- ✅ Glycol closed-loop freeze protection (works in all climates)
- ✅ Evacuated tubes excel in cold, cloudy weather
- ✅ Complete turnkey kit—minimal additional parts needed
- ✅ 10-year collector warranty; 6-year tank warranty
- ✅ Professional-grade performance at DIY prices
Cons:
- ❌ Higher upfront cost ($2,100–$2,240 net after 30% tax credit)
- ❌ More complex installation (glycol loop, controller wiring)
- ❌ Requires periodic glycol testing and replacement (every 3–5 years)
Performance: Evacuated tubes deliver approximately 45,000–55,000 BTU/day in optimal conditions. The 80-gallon tank suits 3–5 person households. Annual savings typically reach $300–$500 in sunny states, yielding 5–7 year payback after incentives. Independent SRCC testing confirms high thermal efficiency across seasons.
Installation note: This is an intermediate-to-advanced DIY project. Budget 2–3 full days for roof mounting, plumbing the glycol loop, tank installation, and controller setup. See our step-by-step installation guide for detailed instructions.
SunHeater 40 Gallon Solar Water Heater Kit (~$1,800–$2,200)
The SunHeater 40 Gallon kit offers a more affordable flat-plate alternative with 40–60 sq ft of collector area, a 40-gallon storage tank, pump, controller, and basic plumbing hardware. Sold via Amazon and specialty retailers.
Pros:
- ✅ Lower cost than evacuated-tube systems
- ✅ Flat-plate collectors proven in warm climates
- ✅ Good fit for 1–3 person households
- ✅ Straightforward installation
Cons:
- ❌ Lower efficiency in cold or cloudy weather vs evacuated tubes
- ❌ Direct circulation design requires freeze protection (drain-down or mild climates only)
- ❌ Smaller capacity limits scalability
Performance: Delivers 20,000–30,000 BTU/day in sunny conditions. Best suited for warm-climate states (Arizona, southern California, Florida, Texas). Expect 60–70% hot water cost reduction with proper sizing. Payback: ~4–6 years.
Mid-Range Kit Comparison Table
| Kit | Price | Collector Type | Tank Size | Output (BTU/day) | Freeze Protection | SRCC OG-300 | Skill Level | Payback* |
|---|---|---|---|---|---|---|---|---|
| Heliatos Standard | $1,323 | Flat plate | 40–80 gal | ~15,000–20,000 | ❌ (mild only) | Verify | ⭐⭐ | 4–6 yr |
| SunMaxx HelioMaxx 80G | $2,800 | Evacuated tube | 80 gal | ~45,000–55,000 | ✅ (glycol) | ✅ | ⭐⭐⭐ | 5–7 yr |
| SunHeater 40 Gallon | $1,800 | Flat plate | 40 gal | ~20,000–30,000 | ❌ (mild only) | Verify | ⭐⭐ | 4–6 yr |
*Payback calculated for sunny states after 30% federal tax credit, based on $0.13–$0.22/kWh electricity rates.

🏆 Pro-Grade Kits for High Demand & Off-Grid Living ($1,000+)
Pro-grade solar tank heater systems deliver maximum efficiency, year-round reliability, and the durability to support large households, off-grid cabins, or demanding commercial applications. These kits feature premium evacuated-tube collectors, oversized storage tanks, sophisticated controls, and robust freeze protection for extreme climates.
SunMaxx TitanPower Plus Series (~$3,500–$5,500)
The TitanPower Plus represents the pinnacle of residential solar diy water heater technology. Available with flat-plate or evacuated-tube collectors, these systems include 80–120 gallon dual-coil tanks, stainless steel pump stations with variable-speed controllers, high-efficiency glycol heat exchangers, and comprehensive warranties.
Pros:
- ✅ Highest thermal efficiency (up to 75% annual solar fraction)
- ✅ SRCC OG-100 certified collectors; OG-300 system certification
- ✅ Dual-coil tanks support solar + backup integration
- ✅ Variable-speed pumps optimize energy use
- ✅ Commercial-grade components with 15–20 year design life
- ✅ U.S.-based technical support
Cons:
- ❌ Premium pricing ($2,450–$3,850 net after tax credit)
- ❌ Advanced installation requires experienced DIYers or professionals
- ❌ Higher maintenance complexity (pump service, glycol monitoring)
Performance: Large evacuated-tube arrays (100+ tubes) can deliver 70,000–90,000 BTU/day, easily supporting 5–8 person households or small commercial facilities. Winter performance remains strong even in northern climates. Annual savings: $500–$800 in high-use scenarios. Payback: 5–8 years depending on energy prices and incentives.
Best for: Large families, multi-generational homes, off-grid properties with high hot water demand, radiant floor heating integration, or small farms/workshops.
Duda Solar 200L Split System (~$3,200–$4,800)
The Duda Solar 200L offers a modular approach with choice of flat-plate or evacuated-tube collectors, a 200L (53 gallon) pressurized tank with dual heat exchangers, pump station, digital controller, and glycol system. Popular among advanced DIYers for flexibility and proven reliability.
Pros:
- ✅ Collector choice allows climate optimization
- ✅ Compact European-style design fits tight roof spaces
- ✅ Active closed-loop with excellent freeze protection
- ✅ Detailed installation manuals and video tutorials
- ✅ Strong international track record
Cons:
- ❌ Smaller tank may require upsizing for larger families
- ❌ Metric fittings sometimes need adapters for U.S. plumbing
- ❌ SRCC certification varies by collector model—verify before purchase
Performance: With evacuated tubes, delivers 35,000–50,000 BTU/day. The 53-gallon capacity suits 2–4 people; consider pairing with a preheat tank for larger households. Excellent cold-climate performance. Payback: 5–7 years after incentives.
Custom Component Builds for Advanced Users ($1,500–$3,000)
Experienced DIYers can assemble pro-grade systems by sourcing components individually:
Core components:
- Collectors: SRCC-certified flat-plate or evacuated-tube panels from Apricus, SunEarth, or Heliodyne. Expect $800–$2,000 for residential-scale arrays.
- Storage tanks: 80–120 gallon indirect tanks with heat exchanger coils; e.g., Rheem Solaraide models at $600–$1,200.
- Pump stations: Pre-assembled units with pump, valves, flowmeter, and temperature gauges: $300–$600.
- Controllers: Differential temperature controllers with dual sensors: $150–$300.
- Glycol & accessories: Propylene glycol antifreeze, expansion tank, pressure relief valves, insulation, pipe, fittings: $200–$500.
Pros:
- ✅ Maximum customization for unique situations
- ✅ Component-level troubleshooting and serviceability
- ✅ Learn system design deeply
- ✅ Often highest performance per dollar for skilled builders
Cons:
- ❌ Requires advanced plumbing, electrical, and code knowledge
- ❌ No single-source warranty or support
- ❌ Permits may require professional sign-off
- ❌ Risk of incompatibility or design errors
Best for: Experienced DIYers, engineers, off-grid builders, or those wanting to integrate with existing radiant heat systems. See our all the parts you need guide for component selection tips.
Pro-Grade Kit Comparison Table
| Kit | Price Range | Collector Type | Tank Size | Output (BTU/day) | SRCC OG-300 | Skill Level | Best For |
|---|---|---|---|---|---|---|---|
| SunMaxx TitanPower | $3,500–$5,500 | Flat/evacuated | 80–120 gal | 70,000–90,000 | ✅ | ⭐⭐⭐⭐ | Large families, off-grid |
| Duda 200L Split | $3,200–$4,800 | Flat/evacuated | 53 gal | 35,000–50,000 | Varies | ⭐⭐⭐⭐ | Advanced DIYers |
| Custom component | $1,500–$3,000 | Your choice | Your choice | Variable | Certify each | ⭐⭐⭐⭐⭐ | Expert builders |
💡 Personal Tip: When sizing pro-grade systems, overestimate collector area slightly for winter performance. I installed 20% more collector area than minimum calculations suggested, and it paid off—my system maintains strong output even during California’s rare cloudy weeks, reducing backup heater runtime dramatically.
For cold-climate installations, review our cold climate playbook to ensure proper freeze protection and insulation.

✅ Installation & Safety Checklist
Proper installation determines whether your solar conversion kit delivers decades of reliable service or becomes a source of leaks, freeze damage, and disappointment. Follow this comprehensive checklist to avoid the most common DIY pitfalls reported in user forums since 2023.
Pre-Installation Planning
Site assessment:
- Verify south-facing roof exposure with minimal shading (use a solar pathfinder or app)
- Confirm roof structure can support collector and tank weight (consult engineer if uncertain)
- Check local codes for roof penetrations, plumbing, and electrical work
- Obtain permits if required—many jurisdictions mandate inspection for systems over 50 gallons
Tool and material prep:
- Assemble all kit components; verify against packing list
- Gather tools: pipe wrenches, tubing cutter, drill, flashing kit, torque wrench, level, multimeter
- Buy supplementary supplies: roof sealant, UV-rated pipe insulation, Teflon tape, anti-seize compound
Collector Mounting
Roof attachment:
- Locate rafters with stud finder; mark mounting points
- Install flashing boots before driving lag bolts through shingles
- Apply generous roof sealant around all penetrations
- Mount rails or brackets; verify level and alignment
- Secure collectors according to manufacturer torque specifications
- For thermosiphon systems, mount tank 12–24 inches above collector top
Common mistakes to avoid:
- Leaks: User reviews cite improper flashing as the #1 source of roof leaks. Use quality metal flashing and liberal sealant.
- Inadequate mounting: Wind uplift forces are significant. Use lag bolts into rafters, not just roof sheathing.
- Poor tilt: Verify collector angle (latitude ±10–15°) for optimal year-round performance.
Plumbing Connections
Direct systems (mild climates only):
- Run insulated copper or PEX lines from cold inlet to collector bottom, then from collector top to hot outlet
- Install check valves to prevent reverse thermosiphon at night
- Add temperature/pressure relief valve rated for maximum stagnation temp (typically 180–210°F)
- Include anti-scald mixing valve set to 120–125°F
Indirect/glycol systems (cold climates):
- Assemble closed-loop circuit: tank heat exchanger → pump station → collectors → return
- Fill with propylene glycol mixture (consult manufacturer spec—typically 30–50% concentration)
- Purge air using fill ports while pump runs; pressurize to 20–30 psi
- Install expansion tank sized per glycol volume
- Heavily insulate all exterior piping with UV-rated foam pipe insulation
Common plumbing issues (forum-reported since 2023):
- Leaks at fittings: Over-tightening can crack fittings; under-tightening leaks. Use two wrenches and proper torque.
- Air locks: Bleed air systematically from high points; some systems need manual purging multiple times.
- Scaling: Hard water causes mineral buildup in heat exchangers. Install sediment filter and plan annual flush with descaling solution.
Electrical & Controls
Active system wiring:
- Mount differential controller near pump station; follow manufacturer diagrams
- Install temperature sensors at collector outlet and tank bottom; secure with thermal paste and insulation
- Wire pump to controller relay; verify correct voltage (120V AC typical)
- Test controller logic: pump should start when collector is 5–10°F hotter than tank
Safety devices:
- Install high-limit cutoff to prevent overheating (set ~10°F below relief valve opening)
- For PV-direct systems, follow electrical code for DC wiring and grounding
- Label all shutoffs, valves, and emergency procedures
Common electrical mistakes:
- Sensor placement: Sensors touching pipe surface without thermal paste give false readings
- Inadequate wire gauge: Undersized wire causes voltage drop and pump failure
- Skipped ground: Always ground metal components per code
Commissioning & Testing
System startup:
- Fill system slowly; watch for leaks at every connection
- Start pump manually; verify circulation and flow direction
- Monitor collector temperature rise on sunny afternoon
- Check for proper drainback or freeze-valve operation (if applicable)
- Set backup heater thermostat 10–20°F below solar tank target
Performance verification:
- Measure tank temperature gain over 4–6 hours of strong sun
- Typical target: 40–80°F rise for properly sized system
- Verify no reverse circulation at night (check valve function)
- Confirm mixing valve limits outlet temperature to safe range
Maintenance Schedule
Monthly (first 3 months):
- Check glycol loop pressure; top up if needed
- Inspect for leaks; tighten fittings if wet
- Verify pump operation and controller readings
Annually:
- Clean collector glazing
- Check insulation for UV damage; replace as needed
- Test relief valves
- Flush sediment from tank
- Verify freeze protection (glycol concentration test)
Every 3–5 years:
- Replace glycol fluid (degrades over time)
- Service pump bearings or replace worn components
- Inspect anode rod in storage tank; replace if corroded
For detailed troubleshooting, see our troubleshooting guide.
🚨 Important Note: The most dangerous DIY mistake is skipping the anti-scald mixing valve. Solar-heated water can reach 180°F in summer, causing severe burns. Always install a thermostatic mixing valve set to 120–125°F at the tank outlet. This single component prevents thousands of emergency room visits annually.
Safety Quick Reference
| Hazard | Prevention |
|---|---|
| Scalding | Install mixing valve; set to 120–125°F |
| Roof leaks | Proper flashing, sealant; professional help if unsure |
| Freeze damage | Glycol loop or drainback; insulate pipes |
| Electrical shock | Follow code; ground all metal; use GFCI |
| Pressure buildup | Sized relief valve; expansion tank |
| Falls | Use proper scaffolding/harness for roof work |

❓ DIY Solar Hot Water FAQs
What is the difference between a solar heating kit and a traditional water heater?
A solar heating kit uses collectors to capture sunlight and convert it to heat, typically reducing water-heating energy costs by 50–80%. Traditional electric or gas water heaters rely entirely on utility energy. Solar systems require higher upfront investment but deliver decades of free fuel once installed. Most solar setups retain a traditional heater as backup for cloudy periods or high demand.
Can I install a solar diy water heater myself, or do I need a professional?
Many homeowners successfully install entry-level and mid-range kits with intermediate plumbing and electrical skills. Budget PV-direct systems are especially DIY-friendly, requiring no solar plumbing. Complex glycol loops, roof mounting, and code compliance may benefit from professional help or consultation. Start with simpler kits if you’re new to solar; advanced systems demand carpentry, soldering, and electrical expertise. Our step-by-step installation guide walks through each phase.
How much money can I save with a solar hot water diy kit?
Savings depend on local energy costs, system size, and climate. In sunny states like Arizona, California, Florida, and Texas, typical residential systems save $250–$600 annually on water heating. Budget PV-direct kits yield $200–$400/year; pro-grade evacuated-tube systems can exceed $500/year. With federal 30% tax credits, payback ranges from 1.5–4 years (budget kits) to 5–8 years (premium systems).
Which states or utilities require SRCC OG-300 certification for rebates?
California, Massachusetts, New York, and many Florida and Texas utilities require SRCC OG-300 certification for solar water heating rebates and tax credits as of 2025. The federal 30% Residential Clean Energy Credit also requires at least 50% of water-heating energy from solar, typically verified via OG-300 certification. Pre-packaged kits from SunMaxx, Apricus, and similar manufacturers clearly state OG-300 compliance. DIY scratch builds and some budget kits lack certification and won’t qualify. Always verify certification before purchasing if claiming incentives. Learn more at rebates & credits: how to qualify.
Do solar water heating kits work in winter or cloudy climates?
Yes, with proper system design. Evacuated-tube collectors excel in cold, cloudy, or windy conditions due to superior insulation. Glycol-based closed-loop systems prevent freeze damage. Winter output typically drops to 30–50% of summer levels, but quality systems still preheat significantly on clear days. Flat-plate collectors work acceptably in mild winters but struggle in severe cold. Always size backup heating to cover extended cloudy periods. See our cold climate playbook for regional strategies.
What maintenance does a DIY solar hot water system need?
Passive thermosiphon systems need minimal upkeep—annual glazing cleaning and leak checks. Active pumped systems require more attention: monthly pressure checks (first few months), annual glycol concentration tests, pump/controller inspection, and sediment flushing. Replace glycol every 3–5 years and service pumps every 10–15 years. Most issues reported since 2023 involve improper initial installation (leaks, air locks) rather than component failure. Quality systems last 20–30+ years with routine care. Read our maintenance & winterization guide for detailed schedules.
Can I use a mini solar water heater for an RV or tiny home?
Absolutely. Compact kits like the Heliatos RV system mount easily on RV roofs and connect to existing 6–10 gallon tanks. Portable batch heaters and PV-direct setups also suit tiny homes and off-grid cabins. Size collectors for lower daily demand (10–20 gallons) and prioritize lightweight, vibration-resistant designs. For mobile applications, consider drainback or PV-direct to avoid freeze damage during travel. Explore our RV & vanlife hot water options for detailed comparisons.
What happens if the system overheats in summer?
Stagnation (overheating during low demand) is common in summer. Properly sized systems include high-temperature relief valves (set at 180–210°F) to vent steam safely. Indirect glycol systems handle overheating better than direct systems. Strategies to prevent damage: drain panels when away for extended periods, install recirculation dump zones, or cover collectors during vacation. Advanced controllers can dump excess heat to pools or radiant floors. Never let pressurized systems overheat without relief protection—explosion risk is real.
Is solar thermal better than using PV panels with an electric water heater?
Solar thermal systems capture 40–70% of sunlight as heat, while PV panels convert ~18–22% to electricity. For dedicated hot water, thermal is more space-efficient. However, PV paired with heat pump water heaters can achieve 36–54% effective efficiency and offers flexibility—excess power serves other loads or exports to the grid. PV systems require less maintenance (no plumbing/glycol) and scale easily. Thermal wins for maximizing hot water per roof area; PV+HPWH wins for simplicity and multi-load flexibility. See our detailed comparison: solar thermal vs PV heat pump water heaters.
🔗 Related Articles
- Solar Water Heaters 101: Types, Pros, Cons & How They Work
- Passive vs Active Solar Water Heating: Which One Fits Your Home?
- Evacuated Tubes vs Flat-Plate Collectors: Performance in All Climates
- Solar Water Heater Costs in 2025: Price Ranges & Payback Examples
- Step-by-Step: Installing a Residential Solar Water Heating System
