
Step-by-Step: Installing a Residential Solar Water Heating System
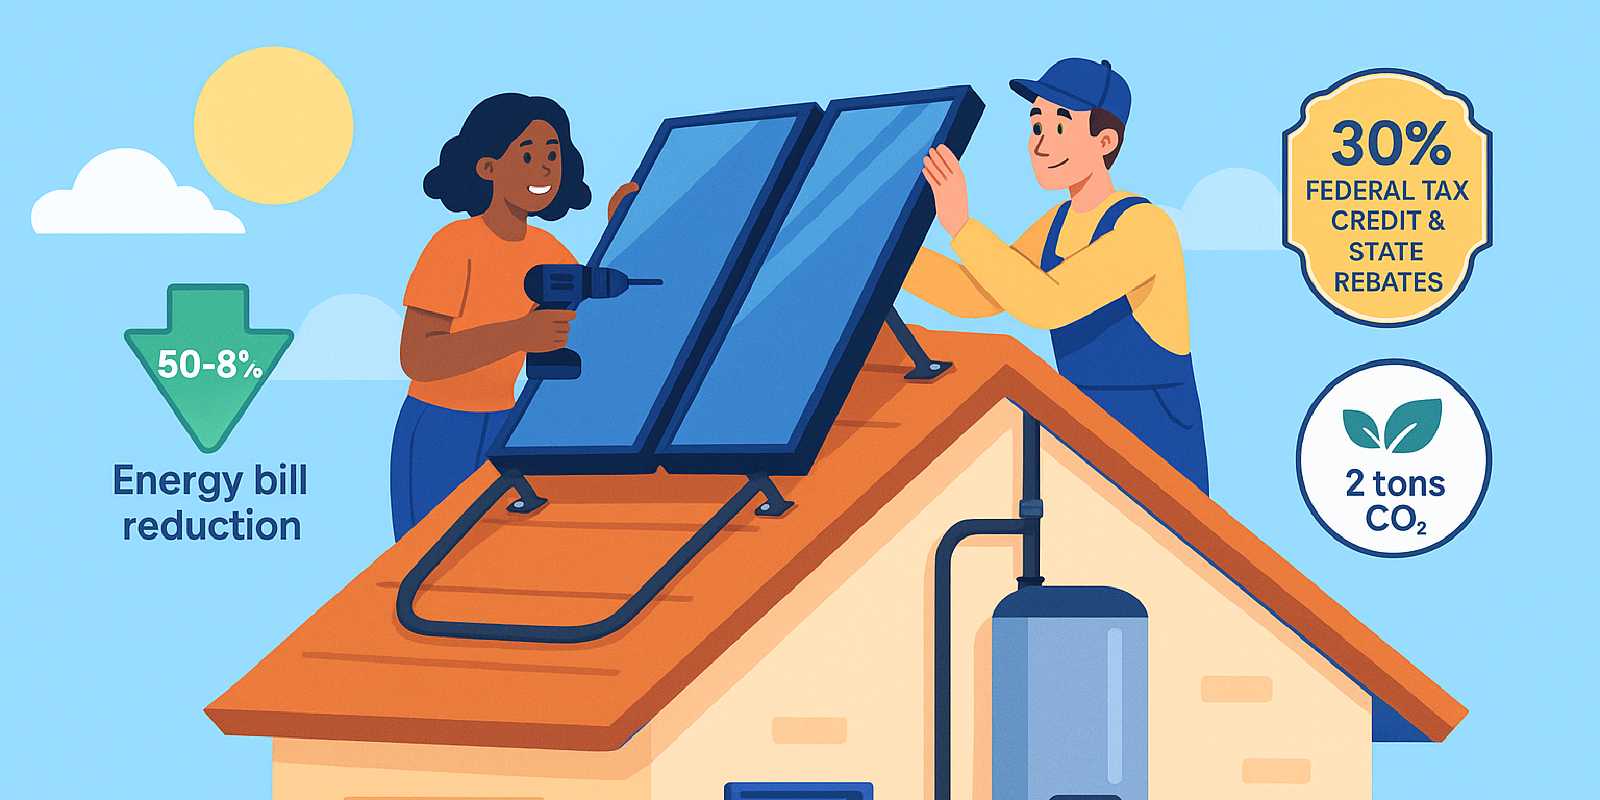
Installing a residential solar water heating system can slash your energy bills by 50–80% while reducing your carbon footprint by 1.5–2 tons of CO₂ annually. This comprehensive guide walks you through every phase of solar water heating installation—from assessing your roof and sizing components to wiring controllers and commissioning your system. Whether you’re a confident DIYer or planning to oversee a professional install, you’ll learn exactly what it takes to bring reliable, sun-powered hot water to your home.
Most residential solar water heater installations involve mounting collectors on a south-facing roof, plumbing a closed or open loop to a storage tank, integrating backup heat, and fine-tuning controls. The process typically takes 1–3 days for experienced installers and requires careful attention to plumbing codes, electrical safety, and structural integrity. By following this step-by-step roadmap, you’ll understand the key decisions, avoid common pitfalls, and ensure your system delivers decades of dependable service.

🏠 Solar Water Heater Installation: Is Your Home Ready?
Before ordering collectors or climbing onto your roof, confirm your site meets three critical criteria: adequate solar access, structural capacity, and favorable local regulations.
Solar Access & Roof Orientation
Target a south-facing exposure (in the Northern Hemisphere) with minimal shading between 9 a.m. and 3 p.m. year-round. Even partial shade from trees, chimneys, or neighboring buildings can reduce output by 20–40%. Use online tools or a solar pathfinder to map shading patterns across seasons.
Roof tilt matters. A quick rule of thumb: set collector tilt to your latitude ±15°. For example, if you live at 35° N latitude, collectors tilted between 20° and 50° will capture strong sun. A 30–40° pitch is ideal for year-round domestic hot water; steeper angles favor winter heating, while shallower tilts optimize summer production.
💡 Personal Tip: Walk your roof at different times of day and note where shadows fall. A single tall tree to the south can cut your solar fraction in half—trim or remove obstructions before installation.
Structural Integrity
Rooftop solar water heating systems add 3–5 pounds per square foot when collectors are filled with fluid. Verify your roof structure can support this additional load, especially if you plan to mount a thermosiphon tank (which can weigh 400+ pounds when full) directly on the roof.
Checklist for structural readiness:
- Roof age and condition: Ideally, your roof should have at least 10 years of remaining life to avoid re-installation costs.
- Rafter spacing and material: Confirm 16- or 24-inch on-center rafters can handle collector mounts and brackets.
- Flat vs. pitched roof: Flat roofs may require tilt frames; pitched roofs need proper flashing and sealant to prevent leaks.
- Local wind/snow loads: Consult building codes for your region; high-wind or heavy-snow areas require reinforced mounts.
🚨 Important Note: If your roof needs replacement within five years, re-roof first. Removing and reinstalling solar collectors later adds $1,000–$2,000 in labor costs.
Climate & Freeze Protection
Your climate zone dictates system type. In freeze-prone regions (where winter lows drop below 32°F for extended periods), active indirect systems with glycol loops are essential. These circulate antifreeze through collectors and transfer heat via a heat exchanger in the tank, preventing freeze damage.
Mild climates (coastal California, southern Arizona, Hawaii) can use simpler direct thermosiphon or batch systems, which circulate potable water directly through collectors. However, even mild zones occasionally freeze; plan for manual draindown valves or seasonal covers if temperatures occasionally dip.
According to recent research, installers in the last 24 months report that using the wrong antifreeze fluid or neglecting fluid maintenance is a top warranty-voiding mistake in cold climates (Sunray Solar). Always use propylene glycol (food-grade, non-toxic) and test concentration annually.
Local Regulations & Utility Compatibility
Contact your local building department early to understand:
- Permit requirements: Most jurisdictions require plumbing and electrical permits for rooftop solar water heating systems.
- HOA restrictions: Some homeowners associations limit visible rooftop equipment or mandate specific aesthetic guidelines.
- Utility interconnection: While solar thermal doesn’t feed electricity to the grid, some utilities offer rebates or require notification for major plumbing alterations.

📏 Sizing Your Collectors, Tank & System Components
Proper sizing ensures your system covers 60–80% of annual hot water demand without overheating in summer or underperforming in winter. Use these benchmarks to match collector area, storage volume, and heat-transfer capacity to your household.
Daily Hot Water Demand
Start by estimating your household’s daily hot water consumption:
- 15–20 gallons per person per day is the industry standard.
- A family of four typically uses 60–80 gallons daily.
Next, calculate the energy required to heat that water from cold supply (typically 50–60°F) to your target temperature (120–140°F). Use the formula:
BTU/day = Gallons/day × 8.34 × ΔT
Where:
- 8.34 = weight of one gallon of water in pounds
- ΔT = temperature rise in °F
Example: For a family of four heating 70 gallons from 55°F to 130°F:
- ΔT = 130 – 55 = 75°F
- BTU/day = 70 × 8.34 × 75 = 43,785 BTU/day (~12.8 kWh/day)
A quality 30-tube evacuated tube collector delivers ~45,000 BTU/day in strong sun, making it a good match.
Collector Area Guidelines
Manufacturers recommend 40–80 square feet of collector area for a family of four, depending on climate and system type (Go Pro Plumbing).
Sizing table by household and climate:
| Household Size | Daily Demand (gal) | Sunny Climate (ft²) | Moderate Climate (ft²) | Cold/Cloudy (ft²) |
|---|---|---|---|---|
| 1–2 persons | 20–40 | 20–32 | 32–40 | 40–50 |
| 3–4 persons | 45–80 | 40–64 | 64–80 | 80–100 |
| 5–6 persons | 75–120 | 64–96 | 96–120 | 120–150 |
- Sunny climates (Arizona, southern California): Lower collector area per gallon; high solar insolation compensates.
- Moderate climates (mid-Atlantic, Pacific Northwest): Increase area by ~20% for clouds and lower sun angles.
- Cold/cloudy climates (northern states, high altitude): Use evacuated tubes and add 25–50% more area for winter performance.
💬 Expert Advice: According to the U.S. Department of Energy, undersizing collectors is a common pitfall. If budget allows, oversize by 10–20% to account for cloudy stretches and ensure strong winter contribution (Energy.gov).
Solar Water Heating Tank Selection
Your solar water heating tank must store enough hot water to cover morning and evening peak demand. An 80-gallon tank is standard for a family of four (Go Pro Plumbing).
Key tank features:
- Heat exchanger coil (indirect systems): Choose tanks with large-surface-area coils (≥10 ft²) for efficient glycol-to-water heat transfer.
- Insulation: Minimum R-16 foam insulation reduces standby heat loss; higher R-values improve overnight retention.
- Dual-coil tanks (optional): One coil for solar, one for auxiliary boiler or heat pump; useful for hybrid systems.
Two-tank vs. one-tank configurations:
- Two-tank preheat: Solar heats a dedicated tank; preheated water feeds your existing conventional heater as “cold” supply. This setup preserves your backup heater and simplifies integration.
- One-tank solar-only: Solar tank includes an electric or gas backup element. Simpler plumbing but requires sizing the tank and backup carefully.
For most retrofits, the two-tank approach is safer and easier to permit.
Pump, Controller & Expansion Components
Active systems require:
- Circulation pump: Sized for flow rate (typically 0.5–1.5 GPM per collector). Bronze or stainless-steel pumps resist corrosion.
- Differential controller: Turns the pump on when collector temperature exceeds tank temperature by ~5–10°C and off when the difference narrows.
- Temperature sensors: One on collector outlet, one on tank; accurate sensors prevent nuisance cycling.
- Expansion tank: Closed glycol loops expand when heated; a small diaphragm expansion tank (2–4 gallons) absorbs pressure changes.
- Pressure relief valve: Required by code; set to ~30 psi for glycol loops.
- Air vent: Automatic air eliminators purge trapped air during fill and operation.
Check the all the parts you need guide for detailed component specifications.

📋 Permits, Incentives & Safety Codes to Secure First
Navigating permits, incentives, and codes before you install saves time, money, and headaches. As of 2025, homeowners can leverage significant federal and state incentives while ensuring their rooftop solar water heating system meets all safety standards.
Federal Tax Credit (30% ITC)
The U.S. Residential Clean Energy Credit returns 30% of total installed cost through 2032. For a $7,000 system, that’s a $2,100 credit (Energy.gov).
Eligibility requirements:
- System must be SRCC OG-300 certified (Solar Rating & Certification Corporation).
- At least 50% of water-heating energy must come from solar.
- Pools and hot tubs are excluded.
Claim process:
- Keep all receipts and invoices showing installed cost (equipment + labor).
- File IRS Form 5695 with your tax return.
- Attach proof of SRCC certification (usually provided by manufacturer or installer).
Unused credits can carry forward to future tax years.
💡 Personal Tip: Combine the federal credit with state/utility rebates to reduce net cost by 40–50%. In sunny states like California and Arizona, combined incentives often deliver payback in 5–7 years (NRG Clean Power).
State & Utility Incentives
As of late 2025, leading state programs include:
- California: Local utilities (PG&E, SCE) offer rebates of $300–$1,500+ depending on system size and location.
- Hawaii: The Hawaii Energy Solar Water Heating Program provides cash incentives and low-interest loans (Hawaii Energy).
- New York: NYSERDA rebates for solar thermal installations.
- Massachusetts: Utility and MassCEC programs encourage solar thermal to reduce fossil fuel use.
Check the Database of State Incentives for Renewables & Efficiency (DSIRE) for current programs in your area, and read our full rebates and credits guide.
Building Codes & Safety Standards
Your solar water heater installation must comply with:
SRCC OG-300 Certification
OG-300 certifies complete systems for performance, durability, and safety. Using certified components ensures code compliance and qualifies you for incentives (Energy.gov).
International Code Council (ICC) Standards
- Uniform Plumbing Code (UPC) or International Plumbing Code (IPC): Requires temperature and pressure (T&P) relief valves on all pressurized tanks, minimum R-2.6 pipe insulation, and corrosion-resistant fittings (brass or bronze).
- International Building Code (IBC): Mandates roof load-capacity assessments and secure anchoring, especially in seismic or high-wind zones.
Common code requirements:
- T&P relief valve: Discharge piping must drain outdoors, no more than 6 inches above grade.
- Thermal expansion control: Closed-loop systems require expansion tanks.
- Anti-scald mixing valve: Required on hot outlets to prevent burns (typically set to 122°F max).
- Check valves: Prevent reverse thermosiphon flow when pumps are off.
- UV-rated insulation: Outdoor piping insulation must resist UV degradation.
According to recent installer reports, improper collector orientation or missing required valves are top warranty-voiding mistakes (Sunray Solar).
Permitting Process
Steps to obtain permits:
- Submit plans: Include a solar water heater installation diagram showing collector layout, tank location, piping routes, and electrical connections.
- Pay permit fees: Typically $100–$300 depending on jurisdiction.
- Schedule inspections: Most localities require a rough plumbing inspection (before walls close) and a final inspection (after commissioning).
- Obtain sign-off: Licensed plumbers or electricians may need to certify work in some regions.
Processing times range from a few days to several weeks—apply early.

🛠️ Tools & Materials Checklist Before You Climb the Roof
Gathering all tools and materials in advance prevents mid-project delays and ensures a safe, efficient installation. This checklist covers everything from collectors to controllers.
Core System Components
Collectors:
- Flat-plate or evacuated tube collectors, SRCC OG-100 certified
- Mounting rails, brackets, and roof flashing kits
- Stainless-steel bolts and UV-rated sealant
Solar water heating tank:
- 80-gallon solar storage tank with heat exchanger coil (indirect) or direct-compatible tank
- Tank stand or wall-mount bracket if not floor-standing
- Drain pan (required by code in living spaces)
Plumbing loop (active indirect system):
- 3/4-inch copper tubing or PEX-AL-PEX rated for glycol
- High-temperature pipe insulation (minimum R-2.6; use R-4+ for outdoor runs)
- Brass or bronze fittings (elbows, tees, unions, compression fittings)
- Ball valves for isolation (collector inlet/outlet, tank supply/return)
- Spring-loaded check valve (prevents reverse flow)
- Pressure/temperature relief valve (rated for max system pressure)
- Expansion tank (2–4 gallons for glycol loop)
- Air eliminator/vent
Pump & controls (active systems):
- Solar circulating pump (bronze or stainless, ~1/25 HP for small systems)
- Differential temperature controller with display
- Two temperature sensors (RTD or thermistor type; one for collector, one for tank)
- Low-voltage wiring (18–22 AWG) for sensors
- Junction box and conduit for pump wiring
- Relay or contactor if pump requires 120V AC
Glycol & fill station (indirect systems):
- Food-grade propylene glycol (enough for loop volume plus 15% expansion; typically 3–6 gallons)
- Bucket, funnel, and hand pump or electric glycol pump
- Pressure gauge and fill/drain valves
Backup & distribution:
- Anti-scald mixing valve (thermostatic, adjustable 95–140°F)
- Existing electric or gas water heater (as backup)
- Pipe insulation for all hot-water distribution lines
Installation Tools
Roofing & structural:
- Ladder with standoff brackets (never lean directly on gutters)
- Roof harness and fall-protection anchors (OSHA-required for steep roofs)
- Tape measure, chalk line, and carpenter’s square
- Cordless drill/impact driver with masonry and wood bits
- Lag bolts or structural screws (stainless or galvanized)
- Roofing sealant (polyurethane or butyl-based), flashing material
- Tin snips and metal file
Plumbing:
- Pipe cutter or hacksaw for copper/PEX
- Tubing bender (if using soft copper)
- Propane torch and lead-free solder (for copper joints)
- PEX crimper or expansion tool (for PEX-AL-PEX)
- Pipe wrench and adjustable wrenches
- Teflon tape and pipe dope
- Bucket and rags for fluid cleanup
Electrical (if installing pump/controller):
- Wire strippers and crimpers
- Voltage tester or multimeter
- Screwdrivers (Phillips and flathead)
- Wire nuts and electrical tape
- Conduit bender (if running metal conduit)
Testing & commissioning:
- Glycol refractometer or test strips (to verify freeze protection)
- Digital thermometer or infrared gun
- Pressure gauge (0–60 psi)
- Garden hose and air compressor (for leak testing)
💡 Personal Tip: Label every valve and sensor wire as you install. Six months later, when you need to drain the system for maintenance, clear labels save hours of head-scratching.
Safety Gear
- Hard hat
- Safety glasses
- Work gloves (cut-resistant for metal edges)
- Non-slip work boots
- Sunscreen and hydration (rooftop work in summer heat is grueling)

🔧 Step-by-Step Installation Guide: Collectors to Hot-Water Tap
This phase-by-phase walkthrough covers mounting collectors, plumbing the heat-transfer loop, integrating storage, wiring controls, and filling the system. Follow manufacturer instructions closely—these steps provide a general framework for active indirect systems, the most common residential configuration.
Step 1: Mark & Mount Collector Rails
Choose collector location: South-facing roof section with minimal shading, as close to the tank location as practical to minimize pipe runs.
Measure and mark rail positions:
- Use a chalk line to mark horizontal rows for mounting rails.
- Space rails to match collector mounting holes (typically 4–6 feet apart vertically).
- Ensure rails span at least two rafters for strength.
Attach rails to rafters:
- Locate rafters with a stud finder or by tapping and measuring from eaves.
- Drill pilot holes through shingles and sheathing into rafters.
- Fasten rails with 3/8-inch lag bolts or structural screws, penetrating rafters by at least 2 inches.
- Install roof flashing under shingles and over bolt heads; seal with polyurethane sealant.
Verify rail level and alignment: Use a 4-foot level; rails must be parallel and level across the roof to avoid collector stress.
Step 2: Lift & Secure Collectors
Safely hoist collectors onto roof: Use rope and pulleys or a helper on a second ladder. Evacuated tube collectors are lighter and easier to handle than flat-plates.
Bolt collectors to rails:
- Align mounting brackets on collector frames with rail holes.
- Use stainless-steel bolts and lock washers.
- Tighten snugly but avoid over-torquing, which can warp frames.
Connect collectors in series (if using multiple panels):
- Plumb hot outlet of first collector to cold inlet of second using short flexible hoses or copper jumpers.
- Orient all collectors at the same tilt angle (latitude ±15°).
Install sensor pocket: Most collectors have a threaded sensor boss near the outlet; insert the collector temperature sensor and seal with thermal paste and a compression fitting.
🚨 Important Note: Do not remove protective film or glazing until collectors are mounted and all plumbing is complete. Exposed collectors can overheat and damage seals if left idle in strong sun.
Step 3: Run Insulated Supply & Return Lines
Route pipes from collectors to tank location:
- For attic runs: Secure insulated copper or PEX-AL-PEX to rafters with pipe hangers every 3–4 feet.
- For exterior runs: Use UV-rated pipe insulation (R-4 minimum) and conduit or protective sleeves to prevent physical damage.
- Minimize bends and maintain a slight upward slope from collectors to facilitate air purging.
Install isolation valves:
- Place ball valves on both supply (hot from collectors) and return (cold to collectors) lines near the tank for easy draining and service.
Add check valve on return line:
- Install a spring-loaded check valve in the return line (cold to collectors) to prevent reverse thermosiphon at night.
Insulate all hot piping:
- Wrap supply line with fiberglass or foam pipe insulation (R-2.6 minimum for indoor; R-4+ for outdoor).
- Secure insulation with UV-rated tape or zip ties; paint outdoor insulation with latex paint for UV protection.
Step 4: Install Solar Water Heating Tank & Heat Exchanger
Position tank near existing water heater:
- Place the solar storage tank adjacent to or upstream of your existing backup heater.
- Ensure clearance for future anode rod replacement (typically 18–24 inches overhead).
- Set tank on a sturdy platform or drain pan (code-required in living spaces).
Plumb collector loop to tank heat exchanger:
- Connect supply (hot) line from collectors to the inlet of the heat exchanger coil inside the tank.
- Connect return (cold) line to the outlet of the heat exchanger coil.
- Use unions at both connections for easy future service.
Plumb cold supply to tank bottom:
- Run a cold-water supply line from your main to the tank’s cold inlet (usually at the bottom).
- Install a shut-off valve and drain valve for maintenance.
Plumb hot outlet to backup heater (two-tank configuration):
- Connect the solar tank’s hot outlet (top) to the cold inlet of your existing water heater.
- This allows solar-heated water to “preheat” the backup heater, reducing its load.
Plumb hot outlet to fixtures (one-tank configuration):
- If using a single solar tank with integrated backup (electric element or gas burner), plumb hot outlet directly to distribution lines.
- Install an anti-scald mixing valve at the tank outlet, set to 122°F to prevent burns.
Install pressure/temperature relief valve:
- Screw T&P relief valve into designated boss at top of tank.
- Run discharge pipe vertically down to within 6 inches of floor or drain, using copper or CPVC (no threads or valves in discharge line per code).
Step 5: Wire Pump & Differential Controller
Mount controller near tank:
- Choose a dry, accessible location (basement wall, utility room).
- Run low-voltage sensor wires from collector sensor and tank sensor to controller.
- Use shielded or twisted-pair wire to minimize electrical noise.
Connect pump power:
- If pump uses 120V AC, wire through a dedicated circuit or plug into GFCI outlet.
- Connect pump relay terminals to controller output.
- Follow National Electrical Code (NEC) requirements for conduit and junction boxes.
Set differential temperature parameters:
- Program controller to turn pump on when collector temperature exceeds tank temperature by ~10°F (5–6°C).
- Set pump off when temperature difference narrows to ~3–5°F (1.5–3°C).
Label all wiring: Clearly mark “collector sensor,” “tank sensor,” and “pump” at the controller to simplify future troubleshooting.
💬 Expert Advice: According to installer feedback, incorrect sensor placement is a frequent cause of poor performance. Mount the collector sensor in the outlet manifold (hottest point) and the tank sensor at mid-height on the tank wall or in a sensor well (Sunray Solar).
Step 6: Fill & Pressurize Glycol Loop
Mix propylene glycol solution:
- For freeze protection to 0°F, mix 40% glycol with 60% distilled water.
- For colder climates (down to -20°F), use 50% glycol.
- Consult freeze-point charts and use a refractometer to verify concentration.
Purge air from loop:
- Close all isolation valves except fill/drain valves.
- Connect glycol pump or hand pump to fill valve at bottom of loop.
- Open vent valve at highest point (usually near collectors).
- Slowly pump glycol into system until fluid flows from vent without air bubbles.
- Close vent valve.
Pressurize to 20–25 psi:
- Continue pumping until pressure gauge reads target pressure (typically 20–25 psi cold).
- Close fill valve; disconnect pump.
Leak-test all joints:
- Inspect every fitting, valve, and sensor boss for leaks.
- Tighten or re-solder any weeping connections.
- Let system sit pressurized for 24 hours and recheck pressure (minor drop is normal; steep drop indicates a leak).
Step 7: Commission & Test Operation
Uncover collectors on a sunny day:
- Remove protective film or covers from collectors mid-morning.
- Within 15–30 minutes, collector temperature should begin to rise.
Verify pump activation:
- Watch controller display; pump should turn on once collector temperature exceeds tank temperature by the set differential.
- Confirm pump is circulating by feeling supply and return pipes (supply should warm up; return should cool slightly).
Check for flow and temperature gain:
- Monitor tank temperature over 2–4 hours; it should climb steadily on a sunny day.
- Target tank temperatures of 120–140°F by late afternoon in good conditions.
Test relief and mixing valves:
- Manually lift T&P relief valve lever briefly to confirm it seats properly.
- Adjust anti-scald mixing valve to deliver 120–122°F at taps.
Set backup heater thermostat:
- Lower electric or gas backup to ~120°F if using two-tank preheat, or 130–140°F if one-tank with integrated backup.
- Solar should handle most loads in summer; backup covers cloudy days and high demand.
For detailed troubleshooting steps, refer to the troubleshooting guide.

🔍 Commissioning, Testing & Troubleshooting Your New System
After installation, a thorough commissioning process ensures your rooftop solar water heating system operates safely and efficiently. Address any issues early to avoid long-term performance degradation.
Initial Commissioning Checklist
Visual inspection:
- ✅ All collector mounts tight and properly flashed
- ✅ No visible leaks at pipe joints or fittings
- ✅ Insulation continuous and UV-protected outdoors
- ✅ T&P relief valve discharge pipe terminates safely
- ✅ Anti-scald mixing valve installed and accessible
- ✅ Pump and controller wired correctly with sensors labeled
Pressure checks:
- ✅ Glycol loop holding 20–25 psi after 24 hours
- ✅ Expansion tank pre-charge matches loop pressure (per manufacturer)
- ✅ No pressure drop indicating hidden leaks
Temperature performance:
- ✅ Collector outlet temperature rises 20–40°F above ambient on sunny days
- ✅ Tank temperature climbs steadily over 3–4 hours of sun
- ✅ Backup heater cycles only when solar input insufficient
Safety tests:
- ✅ T&P relief valve lifts and reseats cleanly
- ✅ Mixing valve delivers 120–122°F at taps (anti-scald protection)
- ✅ Pump relay cycles on/off as controller commands
Common Installation Issues & Fixes
Problem: Pump runs but tank doesn’t heat
Causes:
- Air trapped in loop blocking flow
- Check valve installed backward
- Glycol concentration too high (viscosity limits flow)
Fixes:
- Re-purge air via vent valves at high points
- Verify check valve arrow points toward collectors
- Test glycol with refractometer; dilute if over 50%
Problem: Controller cycles on/off rapidly
Causes:
- Sensors placed too close together or in wrong locations
- Differential set too narrow
Fixes:
- Move collector sensor to hottest point (outlet manifold)
- Move tank sensor to mid-height on tank wall
- Widen differential to 10°F on, 5°F off
Problem: Relief valve drips during sunny days (stagnation)
Causes:
- Tank fully heated; no load; collectors continue to add energy
- Expansion tank undersized or pre-charge incorrect
Fixes:
- Verify expansion tank pre-charge matches loop pressure
- Install larger expansion tank if stagnation is frequent
- Use covers or drain collectors during extended vacations in summer
Problem: Morning hot water insufficient
Causes:
- Storage tank too small for household demand
- Overnight heat loss from poor insulation
Fixes:
- Add tank insulation blanket (R-10+ wrap)
- Upsize tank or shift hot-water loads to afternoon/evening when solar output peaks
- Ensure backup heater setpoint covers morning demand
Testing for Freeze Protection (Cold Climates)
If your system uses glycol for freeze protection, verify concentration before winter:
- Use a refractometer or glycol test strips to measure freeze point.
- Target -10°F protection in moderate climates; -20°F in severe-cold zones.
- Top up or replace glycol if concentration drifts below specification.
Test freeze-protection recirculation (if equipped): On a freezing night, confirm the controller activates pump briefly to circulate warm tank water through collectors, preventing ice formation.

💰 Maintenance, Efficiency Upgrades & Monitoring Tips
Regular maintenance and smart monitoring maximize your system’s lifespan and savings. Quality solar water heater installations can last 20–30 years, but only if you care for them properly.
Annual Maintenance Tasks
Collector cleaning:
- Inspect glazing for dirt, pollen, or bird droppings; clean gently with mild soap and water.
- For evacuated tubes, check each tube for intact vacuum (cloudy interior indicates failed vacuum); replace damaged tubes individually.
Piping and insulation:
- Check outdoor insulation for UV degradation or cracking; re-wrap or paint as needed.
- Look for leaks at fittings; tighten or re-solder if necessary.
Pump and controller:
- Verify pump operation on a sunny day; listen for unusual noise (bearing wear).
- Test controller display and sensor readings for accuracy; replace batteries in wireless controllers.
Tank inspection:
- Inspect anode rod annually (if accessible); replace when 50% eroded to extend tank life.
- Flush sediment from tank bottom via drain valve to maintain heat transfer and prevent corrosion.
Glycol loop (indirect systems):
- Test glycol freeze point and pH; replace fluid every 3–5 years or per manufacturer schedule.
- Check loop pressure; top up if below 15 psi.
For complete guidance, see the maintenance and winterization guide.
Efficiency Upgrades
Add insulation:
- Wrap tank with an R-10 fiberglass blanket to cut standby losses by 10–20%.
- Upgrade outdoor pipe insulation to R-6 if originally installed with minimal coverage.
Install a recirculation timer:
- If your system has a hot-water recirculation loop, use a timer to run the pump only during morning/evening peak hours, saving electricity and heat.
Integrate PV backup:
- Install a small solar panel for water heater backup element to reduce grid reliance. Even a 200W panel can cut electric use significantly on sunny days.
Upgrade to smart controller:
- Modern differential controllers log temperature data and alert you to performance drops via smartphone apps, enabling proactive maintenance.
Monitoring & Performance Tracking
Track these metrics monthly to catch problems early:
- Tank temperature at 3 p.m.: Should reach 130–150°F on sunny days in peak season.
- Backup heater runtime: Log gas or electric use; if backup runs constantly in summer, investigate collector shading or pump failure.
- Glycol pressure: Should hold steady; slow drops indicate leaks.
Use a basic logbook or smartphone app to record readings. Compare year-over-year to identify degradation trends.
💡 Personal Tip: I keep a simple spreadsheet tracking monthly tank temps and backup kWh. When my backup usage spiked one summer, I discovered a failed pump bearing—catching it early saved me $400 in wasted electricity and a full system drain.
Cost & Payback Snapshot: Real-World Case Study
A homeowner in Arizona installed a 64 sq ft flat-plate collector system with an 80-gallon solar tank in 2024. Total installed cost: $7,000.
Incentives:
- 30% federal tax credit: -$2,100
- Arizona state rebate: -$1,000
- Net cost: $3,900
Annual savings:
- Reduced electric water heating from ~1,400 kWh/year to ~300 kWh/year
- Savings: 1,100 kWh/year × $0.13/kWh = $143/year
- With rising rates, projected to save $200+/year within five years
Payback:
- Simple payback: $3,900 ÷ $143 = ~27 years at current rates
- However, accounting for 5% annual energy-price inflation and 20-year system life, lifetime savings exceed $5,000, making the project cash-positive.
In sunny states with high electricity costs (California, Hawaii), payback periods of 5–7 years are common (NRG Clean Power).

❓ FAQs: Your Top Solar Roof Water Heating Questions Answered
Can I install a solar water heater myself, or do I need a professional?
Confident DIYers with plumbing, roofing, and basic electrical skills can install simpler systems (passive thermosiphon, small active kits). However, professional installation is recommended for active indirect systems, complex roof penetrations, and to ensure code compliance and warranty validity. Pros install in 1–3 days; DIY may take a weekend or two.
How long does a solar water heating installation take?
Professional installers typically complete a residential solar water heater installation in 1–3 days, depending on system complexity, roof access, and tank placement. DIY installations often require 2–4 full days spread over weekends, plus permitting and inspection wait times.
What permits do I need for a rooftop solar water heating system?
Most jurisdictions require plumbing and electrical permits for solar water heating installation. Submit a solar water heater installation diagram showing collector layout, tank location, and piping. Inspections are typically required before system commissioning. Check with your local building department early in the planning process.
Will my roof support the weight of collectors and a solar water heating tank?
Most modern roofs easily support flat-plate or evacuated tube collectors (3–5 lbs/sq ft when filled). However, roof-mounted thermosiphon tanks (400+ lbs when full) require structural verification. Consult a structural engineer if your roof is over 20 years old or has sagging rafters. Always confirm rafter spacing and load capacity before installation.
How do I size my collector area and solar water heating tank?
Use 15–20 gallons per person per day to estimate demand. For a family of four (60–80 gallons/day), plan for 40–80 sq ft of collector area depending on climate and system type. An 80-gallon tank is standard. Colder climates require larger collector areas; evacuated tubes perform better in clouds and cold. See the sizing table earlier in this guide for detailed benchmarks.
Do I need freeze protection, and how do I add it?
If winter lows drop below 32°F for extended periods, use an active indirect system with propylene glycol in a closed loop and a heat exchanger in the tank. Glycol prevents freeze damage. Mild climates can use direct systems with manual draindown valves. Test glycol concentration annually with a refractometer to ensure adequate protection.
How much money can I save with a solar water heater installation?
Quality systems reduce water-heating energy by 50–80%, saving $100–$300+ annually depending on household size and local energy rates. With the 30% federal tax credit and state rebates, typical payback is 5–10 years in sunny regions. Over a 20-year lifespan, savings often exceed $3,000–$6,000.
What maintenance does a solar roof water heater require?
Annual tasks include cleaning collector glazing, checking pipe insulation, testing pump operation, verifying controller settings, and inspecting for leaks. Indirect systems require glycol testing and replacement every 3–5 years. Tanks need anode rod inspection and sediment flushing. Passive systems have minimal maintenance. Budget ~2–4 hours per year for DIY upkeep or hire a pro for a service call every few years.
Can I integrate a solar water heating element into my existing water heater?
Yes. The two-tank preheat approach allows you to keep your existing electric or gas heater as backup. Solar-heated water feeds the cold inlet of your current tank, reducing its workload. Alternatively, install a solar water heating element (PV-powered immersion heater) in your existing tank for a simpler retrofit. See the DIY retrofit kits guide for step-by-step instructions.
What are the most common installation mistakes that void warranties?
Top warranty-voiding errors include improper collector orientation (not true south or wrong tilt), missing required valves (T&P relief, check valves, mixing valves), inadequate pipe insulation, incorrect glycol concentration, poor electrical connections, and skipping permits. Always follow manufacturer instructions and SRCC OG-300 guidelines to preserve warranty coverage.
🔗 Related Articles
- Solar Water Heaters 101: Types, Pros, Cons, Sizing, How They Work
- All the Parts You Need: Pumps, Controllers, Valves, Heat Exchangers
- Rebates & Credits: How to Qualify for Solar Hot Water Incentives
- Maintenance & Winterization: Keep Your Solar Hot Water Running
- DIY Solar Hot Water: Best Kits by Budget & Skill Level
- Troubleshooting Guide: Not Hot Enough, Pump Stuck, Freeze Damage
