
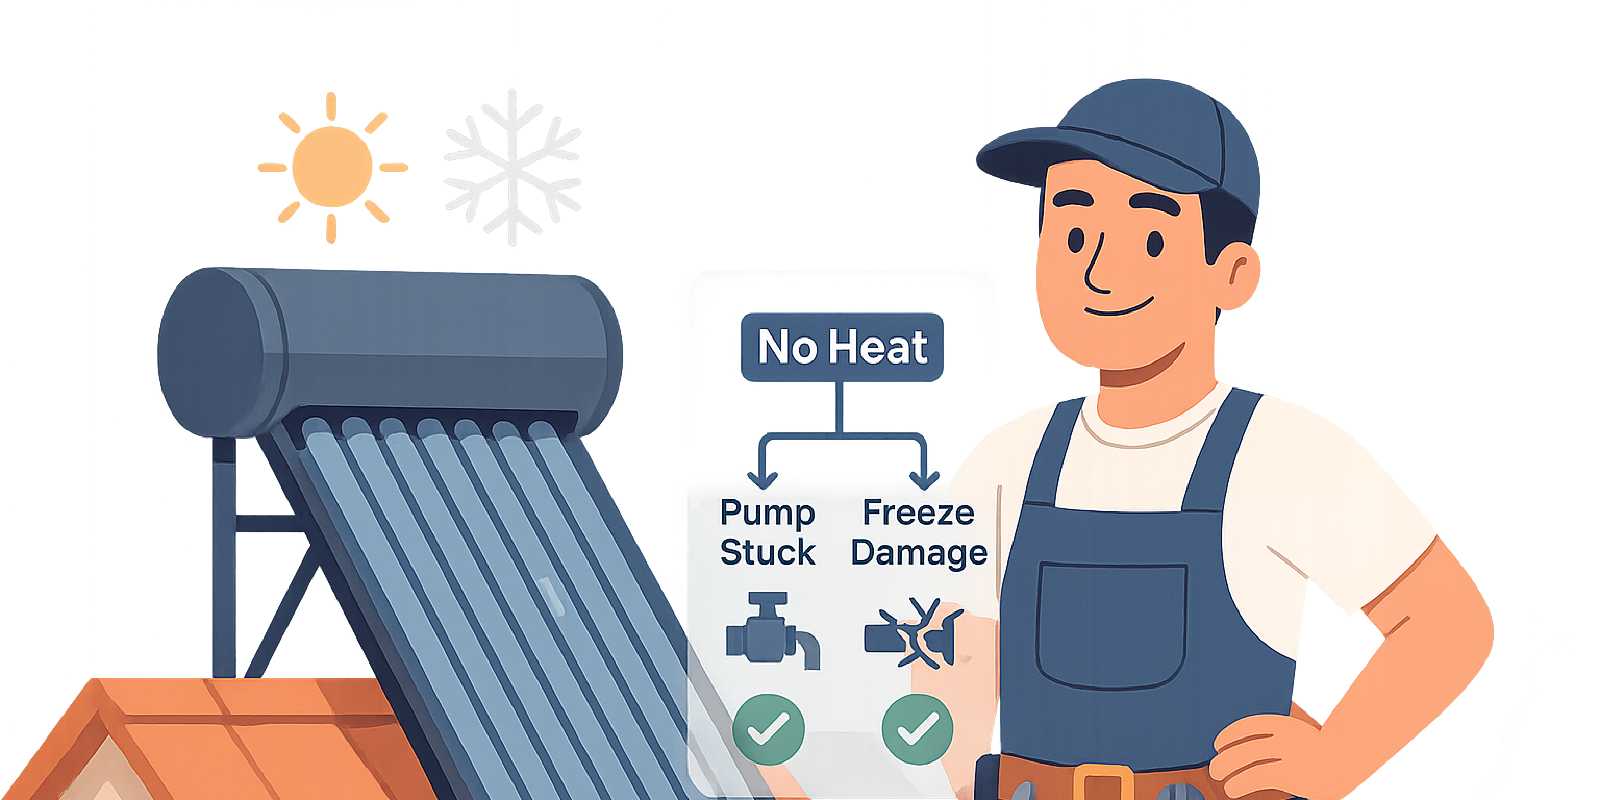
Troubleshooting Guide: Not Hot Enough, Pump Stuck, Freeze Damage
When your solar water heater stops delivering hot water on a sunny day, you need answers fast. This practical troubleshooting guide walks you through the three most common solar water heater failures—insufficient heating, stuck pumps, and freeze damage—with clear diagnostic steps, real component costs, and proven fixes you can apply today.
Whether you’re a hands-on homeowner or managing a contractor, you’ll learn to pinpoint the problem using a simple framework, understand when to DIY versus call a pro, and prevent repeat failures. We’ll cover solar water heater troubleshooting fundamentals, common issues with solar water heater components like controllers and pumps, and the repair-versus-replace economics that save you money.

🔍 How Solar Water Heaters Fail: A 3-Minute Diagnostic Framework
Most solar water heater problems fall into one of three categories: no heat, no circulation, or physical damage. Use this fast decision tree to identify your issue before diving into detailed fixes.
Quick Diagnostic Decision Tree
Start here: Is there hot water at all?
- No → Check circulation first (pump/controller).
- Yes, but not hot enough → Evaluate collectors, sensors, and shading.
- Intermittent or cold mornings only → Examine storage, backup element, and mixing valves.
Is the pump running?
- Yes, but no heat → Inspect collectors, sensors, or check valves.
- No → Test solar water heater controller, sensors, and electrical connections.
- Runs at wrong times (e.g., at night) → Sensor or controller fault.
Any visible damage or leaks?
- Yes → Freeze damage, corrosion, or pressure relief valve issues.
- No → Focus on controls, flow, and performance.
The Three Major Failure Modes
According to recent field data and troubleshooting forums, the most frequently reported residential solar water heater issues over the past five years are:
- Insufficient heating: Water doesn’t reach expected temperature despite sunny conditions. Often due to dirty collectors, faulty sensors, shading, or undersized systems.
- Circulation pump failure: Solar hot water recirculating pump doesn’t run, runs continuously, or activates at incorrect times. Caused by electrical faults, sensor errors, air in the system, or pump motor issues.
- Freeze damage: Burst pipes, cracked collector tubes, or valve failures from freezing temperatures in climates without adequate freeze protection.
Other common issues include leaks from aging pipes or tanks, stuck check valves causing reverse thermosiphoning, and controller/sensor malfunctions that disrupt system timing. Sources: Energy.gov, DIY Solar Forum, Solar Panel Talk
Expected Performance Benchmarks
To diagnose underperformance, you need to know what “normal” looks like:
- Flat-plate collectors on a clear 77°F (25°C) day typically deliver outlet temperatures of 113–149°F (45–65°C).
- Evacuated-tube collectors perform better, reaching 131–176°F (55–80°C) under the same conditions, often 9–27°F (5–15°C) warmer than flat plates.
If your system is producing temperatures significantly below these ranges on sunny days, you likely have a collector, circulation, or sensor problem. Understanding these baselines is essential for effective solar water heater troubleshooting.

🌡️ Solar Water Heater Not Hot Enough: Root Causes & Quick Fixes
When your solar water heater delivers lukewarm or cold water despite good sun exposure, the problem is usually environmental, mechanical, or control-related. Here’s how to systematically diagnose and fix insufficient heating.
Environmental & Collector Issues
Shading or obstruction:
- Symptom: Low output even on clear days; output improves at certain times.
- Fix: Inspect collectors for tree shadows, roof features, or new construction. Trim branches or relocate obstructions. Even partial shading dramatically reduces performance.
Dirty or degraded glazing:
- Symptom: Gradual performance decline over months; visible dust, pollen, or mineral deposits on collector glass.
- Fix: Clean glazing with mild detergent and soft cloth or sponge. Rinse thoroughly. Schedule cleaning annually in dusty climates or after pollen season. For evacuated tubes, verify vacuum integrity—cloudy or fogged inner tubes indicate vacuum loss and require tube replacement.
Collector orientation or tilt:
- Symptom: Never reaches expected temperature; poor winter performance.
- Fix: Confirm collectors face south (Northern Hemisphere) and are tilted at or near local latitude. Adjusting tilt seasonally (steeper in winter) can improve performance if mounting allows.
Sensor & Controller Faults
The solar water heater controller orchestrates pump operation based on temperature differences between collectors and storage. Faulty sensors are a top cause of heating failures.
Dislodged or poorly placed sensors:
- Symptom: Pump runs at night or not at all; erratic temperature readings.
- Fix: Check that the collector sensor is firmly attached to the absorber plate or header pipe, not loose in the airspace. Tank sensor should be immersed in a thermowell or tightly strapped to the tank surface with thermal paste. Re-secure sensors and verify controller displays accurate temperatures.
Controller differential settings:
- Symptom: Pump turns on late or off early; inconsistent heating.
- Fix: Most solar water heater controllers use a differential control: pump turns on when the collector is ~9–18°F (5–10°C) warmer than the tank, and off when the difference drops to ~3.6–7.2°F (2–4°C). Verify settings match system design. Adjust turn-on differential if needed to start circulation earlier on marginal days. Source: Energy.gov
Failed sensors or controller:
- Symptom: No pump operation despite sunny skies and cold tank; or pump runs continuously even when tank is hot.
- Fix: Test sensor resistance with a multimeter against manufacturer specs (typically thermistor-type sensors). Replace faulty sensors. If sensors test good but controller behaves erratically, replace the solar water heater controller unit.
Circulation & Flow Problems
Air in the system:
- Symptom: Gurgling noises; poor heat transfer; intermittent flow.
- Fix: Bleed air from high points in the loop using air vents or bleed valves. For closed-loop glycol systems, ensure system is properly pressurized (typically 20–30 psi when cold). Top up glycol if needed.
Stuck or failed check valve:
- Symptom: Tank cools overnight (reverse thermosiphoning); poor daytime performance.
- Fix: Check valves prevent hot water from flowing backward through collectors at night. Tap valve gently or remove and clean debris. Replace if spring or flapper is damaged. Install high-quality spring check valves at collector return to prevent heat loss.
Low pump flow:
- Symptom: Collectors very hot, tank lukewarm; slow temperature rise.
- Fix: Verify solar hot water recirculating pump is running at full speed. Check for clogs in filters, strainers, or pipes. Ensure pump is sized correctly (typically 3–10 GPM for residential systems). Increase flow rate if adjustable, or replace undersized pump.
System Design & Sizing
Undersized collector array:
- Symptom: Never fully meets hot water demand even on best days.
- Fix: Calculate required collector area: typically 20–40 sq ft per household member, more in cloudy/cold climates. Add collectors if space and budget allow, or adjust usage expectations and ensure backup heating is optimized.
Inadequate storage or mixing:
- Symptom: Morning water cold; afternoon scalding hot; inconsistent supply.
- Fix: Verify tank size (typically 1.5–2 gallons per sq ft of collector). Install or adjust anti-scald mixing valve to blend solar-heated water with cold to safe delivery temperature (~120°F/49°C). If storage is too small, consider adding a preheat tank or upgrading to larger solar storage.
Backup solar water heating element issues:
- Symptom: System performs well in sun but no hot water on cloudy days or high-demand periods.
- Fix: Test electric or gas backup. For electric, verify heating element continuity and thermostat settings. Set backup thermostat 10–20°F below solar tank outlet to prioritize solar. Replace failed elements. For gas, check pilot/burner operation and thermostat. Ensure backup activates only when solar cannot meet demand.
Quick Reference: Not Hot Enough Checklist
- ✅ Clean collector glazing and check for shading.
- ✅ Verify sensor placement and controller differential settings.
- ✅ Bleed air from system; confirm pump operation and flow rate.
- ✅ Test and replace faulty check valves.
- ✅ Review system sizing versus household demand.
- ✅ Confirm backup heating operates correctly and supplements solar.

🔄 Pump Stuck or Not Circulating? Step-by-Step Recovery
A non-functioning or erratically operating solar hot water recirculating pump is one of the most common causes of system failure. Pumps rely on proper electrical supply, sensor input, and mechanical integrity to circulate fluid effectively through the solar loop.
Diagnosing Pump Issues
Pump doesn’t run at all:
- Check power supply: Verify pump is receiving voltage (typically 12 V or 24 V DC for solar pumps). Test with multimeter at pump terminals. Inspect fuses, circuit breakers, and wiring connections for breaks or corrosion.
- Test manual override: Many solar water heater controllers have a manual pump test button. If pump runs on manual but not automatically, the problem is controller or sensor-related, not the pump motor itself.
- Inspect pump motor: Listen for humming or buzzing when power is applied. A hum with no rotation suggests a seized bearing or failed capacitor (if AC pump). For DC brushless pumps, check for debris blocking the impeller. Remove pump head and inspect for sediment or corrosion.
Pump runs continuously or at wrong times:
- Sensor fault: If the pump runs at night, it often indicates a short circuit or open circuit in the collector or tank temperature sensors. Test sensor resistance; replace if readings are out of spec. Secure loose sensors to proper locations. Source: Energy.gov
- Controller malfunction: Verify controller settings and differential thresholds. Reset controller to factory defaults if erratic. Replace controller if it fails to respond to sensor inputs correctly.
Pump runs but no flow:
- Air lock or cavitation: Bleed air from system. Ensure glycol loop is fully filled and pressurized (20–30 psi cold). Check for leaks that allow air ingress.
- Closed or blocked valves: Confirm all isolation valves in the loop are open. Check for clogged strainers or filters upstream of pump.
- Failed impeller or internal wear: Remove pump and inspect impeller for damage, wear, or debris. Replace impeller or entire pump unit if worn.
Common DC Solar Pump Specifications
Leading 12 V and 24 V DC solar hot water recirculating pumps typically deliver:
- Flow rate: 3–10 gallons per minute (GPM), depending on model and head pressure.
- Power consumption: Low wattage, often under 50 W, suitable for PV-direct or battery-powered operation.
- Motor type: Brushless DC motors for reliability and longevity.
- Check valve: Many models integrate spring check valves to prevent reverse thermosiphoning.
When replacing or specifying a pump, match flow rate to system size: smaller systems (1–2 collectors) typically need 3–5 GPM; larger arrays may require 7–10 GPM. Oversized pumps waste energy; undersized pumps reduce heat transfer.
Pump Replacement & Maintenance
When to replace:
- Pump motor seized or electrically failed.
- Repeated bearing or impeller failures.
- Pump age exceeds 10–15 years with declining performance.
Replacement steps:
- Isolate system: Close valves on both sides of pump. Drain loop if needed (especially glycol systems).
- Disconnect wiring: Label wires; photograph connections for reference.
- Remove old pump: Unscrew unions or flanges. Have a bucket ready for residual fluid.
- Install new pump: Orient correctly (arrow on pump body indicates flow direction). Use new gaskets or seals. Tighten unions evenly.
- Reconnect wiring: Match polarity for DC pumps (red to positive, black to ground). Secure connections.
- Refill and purge: For glycol systems, refill with proper mixture and bleed air. Pressurize to spec.
- Test operation: Run pump manually via controller. Verify flow and listen for smooth operation. Check for leaks.
Preventive maintenance:
- Annual inspection: Verify pump runs when controller calls for it. Listen for unusual noise or vibration.
- Clean strainers: Remove and clean inlet strainers or filters every 1–2 years to prevent clogging.
- Check electrical connections: Tighten terminals; inspect for corrosion.
- Glycol system: Test and replace glycol every 3–5 years. Degraded glycol can corrode pump internals and reduce freeze protection.
Cost considerations (2024 U.S. estimates):
- Circulation pump replacement: $400–$700 (parts + labor).
- Controller replacement: $300–$600 (parts + labor).
- DIY pump swap: $200–$500 if you do the labor yourself.
Replacing a pump or controller is far less expensive than full system replacement and can restore performance for many more years. Sources: Energy.gov, RoopSolar
Pump Troubleshooting Quick Checklist:
- ✅ Verify power supply and fuse/breaker.
- ✅ Test sensors and controller differential settings.
- ✅ Bleed air; confirm loop is pressurized and filled.
- ✅ Check valves are open; inspect for blockages.
- ✅ Manually test pump operation; listen for motor issues.
- ✅ Replace failed pump or controller as needed; consider age and cost.

❄️ Freeze Damage: Identifying, Repairing & Preventing Cold-Weather Failures
Freeze damage is one of the most catastrophic and preventable failures in solar water heater systems. Burst pipes, cracked collector tubes, and damaged valves can occur when water or inadequate antifreeze freezes and expands. Understanding freeze protection guidelines and winterizing strategies is essential for cold-climate installations.
Identifying Freeze Damage
Common symptoms:
- Visible cracks or splits: Collector tubes, headers, or exterior piping show cracks, often with ice or water stains.
- Leaks after thaw: System drips or sprays water from pipes or fittings once temperatures rise.
- No circulation: Pump runs but no flow; frozen blockage in pipes.
- Collector tube failure: In evacuated-tube systems, individual tubes may crack or lose vacuum, appearing cloudy or wet inside.
- Pressure relief valve discharge: Expansion from freezing can trigger relief valves repeatedly.
Inspection steps:
- Visual survey: Walk the entire loop—collectors, roof piping, basement/attic runs, and tank connections. Look for frost, ice, bulges, or cracks.
- Pressurize (when safe): For closed-loop glycol systems, check system pressure. A sudden drop suggests a leak from freeze damage.
- Collector inspection: For evacuated tubes, examine each tube for cracks or vacuum loss. For flat plates, check headers and risers for splits.
- Test flow: Once thawed, run pump and observe for leaks at joints, valves, and fittings.
Freeze Protection Standards (2024 U.S. Guidelines)
Effective freeze protection relies on matching system design and antifreeze concentration to local climate:
SRCC OG-300 Certification:
- Systems certified to SRCC OG-300 include tested freeze protection and performance standards. Choosing certified systems ensures compliance with best practices and is often required for federal and state incentives. Source: SRCC
Glycol-based antifreeze (closed-loop systems):
- Propylene glycol is the preferred non-toxic antifreeze for solar water heating.
- Concentration by climate zone:
- Mild climates (USDA zones 8–10): ~30% glycol protects to ~15°F (-9°C).
- Moderate cold (zones 6–7): ~40% glycol protects to ~-10°F (-23°C).
- Severe cold (zones 3–5): ~50% glycol protects to ~-20°F (-29°C) or lower.
- Testing and replacement: Test glycol concentration and pH annually with a refractometer or test strips. Replace glycol every 5–10 years or when testing shows degradation. Degraded glycol loses freeze protection and can corrode solar water heater components.
Drainback systems:
- Passive freeze protection: when pump stops, fluid drains from collectors into a reservoir tank.
- Requires careful piping design with continuous downward slope from collectors. No antifreeze needed, but plumbing must be precise to ensure complete drainage.
Heat trace and insulation:
- In exposed or marginal freeze zones, electric heat trace cable on vulnerable pipe sections can prevent freezing. Combine with heavy UV-rated insulation on all outdoor piping.
Repairing Freeze Damage
Minor pipe leaks or fitting cracks:
- Temporary: Drain section; apply pipe repair clamp or epoxy. Not a permanent solution.
- Permanent: Cut out damaged section and replace with new pipe and fittings. Use appropriate materials (copper, PEX, or stainless steel) rated for solar thermal temperatures and UV exposure outdoors.
Collector damage:
- Evacuated tubes: Replace individual cracked tubes. Most systems allow modular tube replacement without draining the entire array. Order replacement tubes from manufacturer; verify model compatibility.
- Flat-plate collectors: Header or riser cracks may require professional repair or collector replacement, depending on severity. Minor leaks can sometimes be welded or brazed by a qualified technician. Severe damage often means replacing the entire collector panel.
Tank or heat exchanger damage:
- Rare but serious. If freeze damage cracks a tank or coil heat exchanger, replacement is typically required. Insulate tanks heavily and locate in conditioned or semi-conditioned spaces to prevent freezing.
Cost of freeze damage repairs (2024 U.S.):
- Minor pipe repair: $100–$300 DIY; $300–$600 professional.
- Evacuated tube replacement (per tube): $50–$150 per tube + labor.
- Flat-plate collector replacement: $1,000–$1,500+ per panel installed.
- Tank replacement: $1,000–$3,000+ depending on size and type.
Freeze damage can quickly exceed the cost of proper freeze protection. Prevention is far more economical than repair.
Preventing Freeze Damage
For new installations:
- Choose the right system: In freeze-prone climates (zones 3–7), specify closed-loop glycol systems or drainback designs. Avoid direct open-loop thermosiphon systems in cold regions.
- Proper glycol concentration: Fill system with glycol mixture matched to the lowest expected temperature plus a safety margin. Document concentration and test annually.
- Quality insulation: Use UV-rated, weatherproof insulation on all outdoor piping. Seal insulation joints and protect from moisture.
For existing systems:
- Test glycol concentration annually: Use a refractometer or hydrometer. Top up or replace glycol as needed. Mark the inspection date on the system.
- Verify drainback function: In drainback systems, confirm collectors drain fully when pump stops. Flush lines and check slope if drainage is incomplete.
- Winterize if vacant: If property will be unheated or system unused during winter, drain the system completely or add/verify freeze protection. Cover collectors to prevent stagnation.
- Monitor weather and temperature: In marginal climates, consider a low-temperature alarm or smart controller that can activate a freeze-protection recirculation mode (briefly circulating warm tank water through cold collectors when outdoor temps approach freezing).
Freeze Protection Checklist:
- ✅ Verify system design matches climate (glycol, drainback, or other).
- ✅ Test glycol concentration annually; replace every 5–10 years.
- ✅ Inspect and repair insulation on outdoor piping.
- ✅ Confirm drainback slope and function (if applicable).
- ✅ Winterize or add heat trace for vacant/seasonal properties.
- ✅ Document freeze protection measures and dates.
For detailed guidance on cold-climate solar water heating, see our Cold Climate Playbook: Glycol Loops, Drainback & Insulation.

💰 Repair vs Replace: Cost & Payback Calculator
When a major component fails, you face a critical decision: repair the part or replace the entire system? Understanding the economics of each option helps you maximize value and avoid throwing money at an obsolete system.
2024 U.S. Component & System Replacement Costs
| Component/System | Typical Cost (Parts + Labor) | Notes |
|---|---|---|
| Circulation pump | $400–$700 | Common repair; extends system life |
| Controller (delta-T) | $300–$600 | Sensors + electronics |
| Single collector panel | $1,000–$1,500+ | Flat-plate or evacuated tube |
| Evacuated tube (individual) | $50–$150/tube + labor | Modular replacement |
| Glycol flush & refill | $200–$400 | Every 5–10 years |
| Storage tank | $1,000–$3,000+ | Size and insulation dependent |
| Full system replacement | $5,000–$10,000+ | Complete new collectors, tank, controls, install |
Sources: Energy.gov, RoopSolar
Repair vs Replace Decision Matrix
Repair makes sense when:
- ✅ System is less than 10–15 years old.
- ✅ Single component failure (pump, controller, sensor, or a few tubes).
- ✅ Collectors and tank are in good condition.
- ✅ Repair cost is less than 30–40% of new system cost.
- ✅ System meets current hot water demand.
- ✅ Incentives or warranties cover part of repair cost.
Replace makes sense when:
- ✅ System is over 20 years old with multiple past repairs.
- ✅ Major component failures (tank, multiple collectors, heat exchanger).
- ✅ Cumulative repair costs approach or exceed 50% of new system cost.
- ✅ System is undersized or poorly designed for current needs.
- ✅ New technology (e.g., evacuated tubes, better controllers) offers significant efficiency gains.
- ✅ Strong solar water heating costs incentives (30% federal tax credit, state rebates) reduce net replacement cost substantially.
Payback Comparison Example
Scenario: Your 12-year-old flat-plate system has a failed pump and degraded glycol. You face either a $1,000 repair or a $7,000 new evacuated-tube system (net $4,900 after 30% federal credit).
Repair option:
- Cost: $1,000
- Expected additional lifespan: 5–8 years
- Annual savings: ~$300/year (existing system efficiency)
- Simple payback: ~3.3 years
Replace option:
- Cost: $4,900 (after credit)
- Expected lifespan: 20+ years
- Annual savings: ~$400/year (higher efficiency, better cold-weather performance)
- Simple payback: ~12 years
- Lifetime savings: ~$8,000+ over 20 years vs repair + eventual second replacement
Decision: If the existing system is otherwise sound and you plan to stay in the home for at least 5 years, repair is cost-effective. If you anticipate further failures or want to upgrade performance, replacing now captures incentives and avoids repeated repair cycles.
DIY vs Professional Repair Matrix
| Task | DIY Suitable? | Skill Required | Safety/Warranty Notes |
|---|---|---|---|
| Cleaning collectors | ✅ | Low | Safe; maintain roof safety |
| Bleeding air/topping off glycol | ✅ | Moderate | Follow glycol handling; maintain pressure |
| Sensor replacement | ✅ | Moderate | Electrical safety; verify sensor specs |
| Pump replacement | ⚠️ | Moderate-high | Plumbing + electrical; may void warranty |
| Controller replacement | ⚠️ | Moderate | Electrical; verify compatibility |
| Collector replacement | ❌ | High | Roof work; pressure testing; warranty critical |
| Glycol system service | ⚠️ | High | Proper glycol disposal; pressure testing |
| Tank replacement | ❌ | High | Plumbing/permitting; professional recommended |
Key considerations:
- Warranty: Many system warranties require professional installation and service. DIY repairs may void coverage.
- Safety: Roof work, high temperatures (collectors can exceed 200°F/93°C when stagnant), and pressurized glycol systems carry risk. Use proper PPE and buddy system for roof access.
- Codes and permits: Major component replacement (tank, collectors) may require permits and inspection. Verify local requirements.
- Quality: Professional installers provide warranties on labor and ensure code compliance, potentially increasing home resale value.
For detailed DIY guidance, see our DIY Solar Hot Water: Best Kits by Budget & Skill Level.
Maximizing Value from Repairs
Leverage incentives:
- The 30% U.S. Residential Clean Energy Credit applies to new system installations and major upgrades, but not minor repairs. If replacing a major component (like a tank or collector array), structure the work to qualify for the credit. Consult a tax professional for guidance.
Plan for lifecycle:
- Replace wear items (pumps, controllers, glycol) on a schedule before they fail to avoid emergency service premiums and system downtime.
- When repairing, upgrade to higher-quality components if affordable (e.g., brushless DC pump, modern digital controller).
Monitor performance:
- Track monthly energy savings and system output. Declining performance signals the need for maintenance or replacement before catastrophic failure.
For more on lifecycle economics, see our Solar Water Heater Costs in 2025: Price Ranges & Payback Examples.

🧰 DIY Troubleshooting Checklist & Essential Tools
Effective solar water heater troubleshooting starts with a methodical approach and the right tools. This checklist and toolkit guide will help you diagnose and fix most common issues safely and efficiently.
Step-by-Step DIY Troubleshooting Checklist
Before you start:
- Turn off pump and backup heater.
- Let system cool if collectors have been in sun.
- Wear gloves and eye protection.
- Have a helper for roof work.
Visual inspection (15 minutes):
- ✅ Walk the system from collectors to tank. Look for leaks, corrosion, damaged insulation, or loose fittings.
- ✅ Check collector glazing for dirt, debris, or shading. Clean if needed.
- ✅ Inspect evacuated tubes for cracks, cloudiness, or vacuum loss. Mark failed tubes for replacement.
- ✅ Verify all isolation valves are open.
- ✅ Examine pressure relief valve for leaks or discharge. Test manually if safe.
Electrical & control checks (20 minutes):
- ✅ Verify power to controller and pump. Check fuses and breakers.
- ✅ Read controller display. Note collector and tank temperatures.
- ✅ Confirm sensor placement: collector sensor on absorber/header, tank sensor immersed or strapped to tank with thermal paste.
- ✅ Test pump manually via controller override. Listen for motor hum or flow noise.
- ✅ Check sensor resistance with multimeter (if specs available). Replace out-of-spec sensors.
- ✅ Verify differential settings: typical on-threshold 9–18°F (5–10°C); off-threshold 3.6–7.2°F (2–4°C).
Circulation & fluid checks (30 minutes):
- ✅ For glycol systems, check system pressure (should be 20–30 psi when cold). Top up if low.
- ✅ Bleed air from high points and air vents. Listen for flow when pump runs.
- ✅ Test glycol concentration with refractometer. Verify it meets freeze protection needs for your zone.
- ✅ Inspect check valve: tap gently and verify it allows forward flow, blocks reverse. Clean or replace if stuck.
- ✅ Measure flow rate if possible (timed fill of bucket from a drain valve). Compare to pump spec (3–10 GPM).
Performance test (sunny day, 1 hour):
- ✅ Run system on a clear morning. Monitor temperatures every 15 minutes.
- ✅ Collector outlet should reach 113–149°F (45–65°C) for flat plates, or 131–176°F (55–80°C) for evacuated tubes on a 77°F (25°C) day.
- ✅ Tank temperature should rise steadily. If not, verify pump operation, flow, and sensor accuracy.
- ✅ Check for reverse flow at night (tank temperature drop). Indicates check valve failure.
Document findings:
- Record temperatures, pressure, and any anomalies.
- Photograph damaged components or unusual conditions.
- Use findings to prioritize repairs or consult a professional.
Essential DIY Solar Water Heater Troubleshooting Tools
Basic toolkit:
- Multimeter: Test voltage, sensor resistance, and continuity. Digital models ($20–$50) are easy to use.
- Pressure gauge: Verify closed-loop system pressure. Many glycol fill/drain kits include gauges.
- Refractometer or hydrometer: Test glycol freeze protection and concentration ($20–$60).
- Thermometer (infrared or probe): Measure collector and pipe temperatures without contact. Infrared models ($25–$100) are fast and safe.
- Adjustable wrenches and pliers: For loosening fittings, valves, and unions.
- Screwdrivers (flat and Phillips): Electrical connections, panel access.
- Bucket and rags: Catch spills when opening fittings.
- Flashlight or headlamp: Inspect dark roof spaces, attics, and basements.
Advanced tools (for serious DIYers):
- Flow meter: Inline or clamp-on models measure GPM. Confirms pump output and system flow.
- pH test strips: Test glycol pH to detect degradation and corrosion risk.
- Thermal camera: Identify cold spots, leaks, or insulation gaps visually ($200–$500; optional but powerful).
- Pipe insulation and UV-rated tape: Repair damaged insulation on outdoor piping.
Safety equipment:
- Work gloves: Heat-resistant and cut-resistant.
- Safety glasses: Protect from glycol splashes, hot water, or debris.
- Roof safety harness and ladder stabilizer: Essential for safe collector access.
- Non-contact voltage tester: Verify electrical circuits are safe to work on.
When to Call a Professional
Even experienced DIYers should recognize when professional help is needed:
Call a pro if:
- ❌ You’re uncomfortable working on a roof or with electrical systems.
- ❌ System requires major component replacement (collectors, tank, heat exchanger).
- ❌ You suspect refrigerant or high-pressure leaks in glycol loops.
- ❌ Local codes require licensed plumber or electrician sign-off.
- ❌ Warranty or insurance coverage requires professional service.
- ❌ Troubleshooting reveals multiple simultaneous failures or unclear root cause.
Questions to ask a contractor:
- Are you NABCEP-certified or trained in solar thermal systems?
- Can you provide references for similar repairs?
- Will you provide a written estimate and warranty on labor?
- Are you insured and licensed for plumbing and electrical work?
- Can you document the repair for warranty or incentive compliance?
For a deep dive into system maintenance best practices, see our Maintenance & Winterization: Keep Your Solar Hot Water Running.

❓ FAQ: Solar Water Heater Troubleshooting Answers
Why is my solar water heater not producing hot water on sunny days?
Common causes include dirty or shaded collectors, faulty sensors preventing pump operation, air trapped in the system, or a stuck check valve causing reverse flow. Clean collectors, verify sensor placement, bleed air, and test the pump and controller.
How do I know if my solar water heater pump is working correctly?
Listen for motor hum and flow noise when the controller activates the pump. Use the controller’s manual override to test pump operation directly. Check that collector outlet temperature rises when the pump runs and that the tank warms over time. If the pump runs but no heat transfers, inspect for air locks, closed valves, or clogs.
What glycol concentration do I need for freeze protection in my climate zone?
For mild zones (8–10), 30% propylene glycol protects to ~15°F (-9°C). Moderate cold zones (6–7) require ~40% for protection to -10°F (-23°C). Severe cold zones (3–5) need ~50% for -20°F (-29°C) or lower. Test concentration annually with a refractometer and replace glycol every 5–10 years.
Can I replace a solar water heater controller myself?
Yes, if you have moderate electrical skills. Turn off power, label and photograph wiring, match sensor types and specs, and follow manufacturer instructions. Incorrect wiring can damage the new controller or sensors. If unsure, hire an electrician to ensure safe installation and warranty compliance.
How much does it cost to fix a frozen solar water heater system?
Minor pipe repairs cost $100–$600. Replacing cracked evacuated tubes runs $50–$150 per tube plus labor. Replacing a damaged flat-plate collector can exceed $1,000–$1,500. Preventing freeze damage with proper glycol concentration or drainback design is far cheaper than repairs.
When should I replace my solar water heater instead of repairing it?
Replace if the system is over 20 years old, has multiple major component failures, repair costs exceed 50% of a new system, or you want to upgrade to more efficient technology. Factor in the 30% federal tax credit, which reduces new system costs significantly and often makes replacement more cost-effective than repeated repairs.
What is the difference between a solar water generator and a solar water heater?
A solar water heater uses solar collectors to heat water for domestic use (showers, laundry, dishes). A solar water generator typically refers to solar-powered water purification or atmospheric water generation devices, which extract or purify drinking water using solar energy. They serve different purposes and are not interchangeable.
How often should I service my solar water heater to prevent problems?
Perform annual inspections: clean collectors, test glycol concentration, verify pump and sensor operation, check for leaks, and inspect insulation. Replace glycol every 5–10 years. Service pumps and controllers as needed, typically every 10–15 years. Consistent maintenance prevents most failures and extends system life to 20+ years.
What are the signs of a failing solar water heater controller?
Erratic pump operation (running at night, not running in sun), incorrect temperature displays, or no response to manual override all indicate controller issues. Test sensors first; if they’re good, the controller likely needs replacement. Digital controllers with error codes simplify diagnostics.
Is it safe to work on my solar water heater myself?
Basic tasks like cleaning collectors, bleeding air, and testing sensors are generally safe with proper precautions. Roof work requires fall protection, and working with hot collectors demands heat-resistant gloves. Electrical and pressurized glycol systems require more skill and safety awareness. Always turn off power and let the system cool before starting work. For major repairs, professional service is safer and often required by warranty or code.
📚 Related Articles
- Maintenance & Winterization: Keep Your Solar Hot Water Running
- Cold Climate Playbook: Glycol Loops, Drainback & Insulation
- All the Parts You Need: Pumps, Controllers, Valves & Heat Exchangers
- DIY Solar Hot Water: Best Kits by Budget & Skill Level
- Solar Water Heater Costs in 2025: Price Ranges & Payback Examples
